








































Les peignes en bois sont très appréciés des ébénistes, des passionnés de bricolage, des propriétaires d’entreprises artisanales et des personnes qui préfèrent les produits naturels et faits main. Que vous souhaitiez créer un peigne pratique pour le quotidien, un cadeau personnalisé ou un produit haut de gamme pour votre boutique, fabriquer un peigne en bois chez soi n’a jamais été aussi accessible.
Ce guide présente les avantages des peignes en bois, décrit plusieurs méthodes de fabrication courantes et explique pourquoi la découpe laser est devenue une solution de premier plan pour les créateurs modernes en Europe.

Dans cet article :
- Partie 1 : Avantages d’un peigne en bois
- Partie 2 : Six méthodes de fabrication d’un peigne en bois
- Méthode 1 : Découpe laser
- Méthode 2 : Usinage CNC
- Méthode 3 : Découpe à la scie à ruban
- Méthode 4 : Artisanat traditionnel
- Méthode 5 : Découpe à la défonceuse
- Méthode 6 : Sculpture sur bois
- Partie 3 : Pourquoi la découpe laser est la meilleure méthode pour fabriquer un peigne en bois
- Partie 4 : Comment fabriquer un peigne en bois avec LX2
- Partie 5 : Conseils pour fabriquer un peigne en bois parfait
- Partie 6 : FAQ sur la fabrication d’un peigne en bois
Partie 1 : Avantages d’un peigne en bois
Les peignes en bois sont utilisés depuis des siècles et restent très appréciés pour leur toucher naturel, leur durabilité et leurs qualités respectueuses des cheveux. Comparés aux peignes en plastique ou en métal, ils offrent plusieurs avantages clés pour les soins capillaires quotidiens :
1. Doux pour les cheveux et le cuir chevelu
Les peignes en bois glissent facilement dans les cheveux sans tirer ni provoquer de casse. Le matériau naturel génère moins de friction, ce qui contribue à réduire l’électricité statique et à garder les cheveux plus lisses et plus sains.
2. Aide à répartir les huiles naturelles
Les dents d’un peigne en bois aident à répartir uniformément les huiles naturelles du cuir chevelu, des racines jusqu’aux pointes. Cela contribue à nourrir les cheveux, à améliorer leur brillance et à maintenir leur hydratation sans avoir besoin de produits coiffants supplémentaires.
3. Durable et respectueux de l’environnement
Les peignes en bois sont généralement fabriqués à partir de ressources renouvelables et conçus pour une utilisation durable. Pour les utilisateurs en Europe, ils constituent une solution pratique pour réduire la consommation de plastique et adopter un mode de vie plus durable.
Partie 2 : Six méthodes de fabrication d’un peigne en bois
Vous pouvez fabriquer des peignes en bois de plusieurs façons, de la sculpture artisanale traditionnelle à l’utilisation d’outils numériques. Chaque méthode présente des avantages et des inconvénients en matière de facilité d’apprentissage et de rapidité de fabrication. Voici six méthodes populaires :
Les peignes en bois peuvent être fabriqués à l’aide de diverses techniques, de l’artisanat traditionnel aux outils numériques avancés. Chaque méthode diffère en matière d’efficacité, de précision et d’évolutivité de la production. Voici six méthodes couramment utilisées en Europe :
Méthode 1 : Découpe laser
La découpe laser est une technique largement adoptée pour produire des peignes en bois avec une grande précision. Une découpeuse laser pour peignes en bois utilise un faisceau lumineux concentré pour réaliser des découpes nettes et un espacement régulier des dents, même pour les designs détaillés.

Source : LaserPecker CraftZone
La découpe laser convient particulièrement pour :
- Façonnage précis : des contours précis qui suivent fidèlement les designs numériques
- Espacement uniforme des dents : garantit des résultats lisses et réguliers
- Gravure détaillée : permet de réaliser des logos, des textures et des motifs fins
- Production efficace par lots : idéale pour les petites entreprises et les artisans
- Réduction du gaspillage de matériaux : des trajectoires de découpe optimisées améliorent l’efficacité
- Bords nets : réduit le travail de post-traitement
- Personnalisation flexible : il est facile d’adapter les designs aux besoins des clients
- Répétabilité fiable : des résultats constants sur plusieurs unités
Méthode 2 : usinage CNC
Les défonceuses CNC utilisent des outils rotatifs pour découper et façonner le bois, ce qui les rend adaptées aux designs de peignes plus épais et aux formes plus complexes.
Cette méthode est idéale pour :
- Corps de peigne solides et durables
- Formes 3D et designs courbés
- Production répétitive avec contrôle constant de la profondeur
Cependant, par rapport à une découpeuse laser, l’usinage CNC est plus lent pour les détails fins et nécessite davantage d’entretien.
Méthode 3 : découpe à la scie à ruban
Les scies à ruban sont couramment utilisées dans les ateliers de menuiserie pour découper la forme initiale du peigne. Des outils supplémentaires sont ensuite nécessaires pour affiner les dents.
Idéal pour :
- Peignes épais aux profils simples
- Designs plus grands avec peu de détails
- Ateliers traditionnels
Une finition manuelle supplémentaire est nécessaire pour obtenir un résultat soigné.
Méthode 4 : artisanat manuel traditionnel
L’artisanat manuel consiste à utiliser des outils manuels pour façonner et finir un peigne du début à la fin. Cette méthode privilégie le savoir-faire artisanal plutôt que la rapidité.
Convient pour :
- Designs artistiques uniques
- Techniques traditionnelles de menuiserie
- Produits artisanaux faits main
Cette méthode prend beaucoup de temps et nécessite un haut niveau de compétence.
Méthode 5 : découpe à la défonceuse
Les défonceuses peuvent être utilisées pour affiner les bords, créer des poignées et ajouter des éléments décoratifs. Avec des réglages précis, elles peuvent également contribuer à la découpe des dents du peigne.
Idéal pour :
- Profilage et façonnage des bords
- Création de courbes et d’angles lisses
- Complément d’autres méthodes de fabrication
Une utilisation prudente est nécessaire en raison de la vitesse de rotation élevée.
Méthode 6 : sculpture sur bois
La sculpture sur bois permet de créer des designs de peignes détaillés et expressifs, avec des éléments décoratifs et des textures. Elle est souvent utilisée pour des produits artistiques ou inspirés de traditions culturelles.
Idéal pour :
- Motifs décoratifs complexes
- Textures et motifs sculptés
- Articles artisanaux haut de gamme
Cette méthode est plus lente et exige un haut niveau de savoir-faire.
Comparaison des méthodes
| Méthode | Précision | Vitesse | Idéal pour |
|---|---|---|---|
| Découpe laser | ★★★★★ | Très rapide | Peignes fins et précis ; gravure ; production en série |
| Usinage CNC | ★★★★☆ | Moyen | Peignes épais, formes en 3D |
| Scie à ruban | ★★★☆☆ | Rapide | Motifs simples, travail du bois traditionnel |
| Fabrication artisanale traditionnelle | ★★☆☆☆ | Lent | Peignes artisanaux, produits faits main |
| Découpe à la défonceuse | ★★★☆☆ | Moyen | Détails et façonnage des bords |
| Sculpture sur bois | ★★☆☆☆ | Très lent | Pièces décoratives ou artistiques |
Chaque méthode offre une combinaison différente de précision, d’efficacité et de liberté créative. Si les techniques traditionnelles permettent un savoir-faire unique, les outils modernes améliorent considérablement la vitesse et la régularité de la production.
Pour les créateurs qui souhaitent concilier qualité, efficacité et flexibilité, une découpeuse laser reste le choix le plus pratique. Elle offre des résultats précis, permet une production rapide et facilite la personnalisation, ce qui la rend idéale aussi bien pour les amateurs que pour les petites entreprises.
Partie 3 : pourquoi la découpe laser est la meilleure méthode pour fabriquer un peigne en bois
Pour les créateurs de toute l’Europe à la recherche d’une solution efficace et évolutive pour produire des peignes en bois en 2026, la découpe laser est devenue la solution la plus pratique. Elle offre une excellente combinaison de précision, de rapidité et de possibilités de personnalisation.
Voici pourquoi une découpeuse laser est largement privilégiée :
- Alignement précis des dents : garantit un fonctionnement fluide et fiable des peignes
- Bords de coupe nets : réduit le besoin de post-traitement
- Production efficace : adaptée aussi bien aux petites séries qu’aux productions plus importantes
- Résultats uniformes : idéale pour maintenir la qualité des produits
- Flexibilité de personnalisation : personnalisez facilement les peignes avec du texte ou des motifs
Que vous soyez amateur ou que vous dirigiez une petite entreprise artisanale, une découpeuse laser offre l’efficacité et le contrôle nécessaires pour obtenir des résultats professionnels.
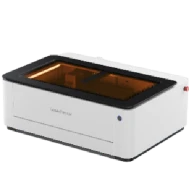
Pourquoi choisir le LX2
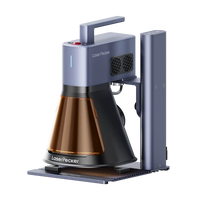
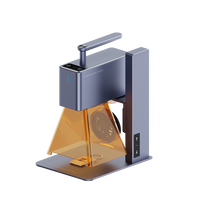
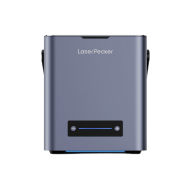
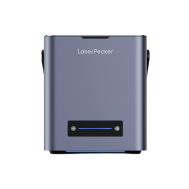
Le LX2 est conçu pour offrir de hautes performances tout en restant accessible aux utilisateurs de toute l’UE, des créateurs en DIY aux petits fabricants.
-
Vitesse de traitement élevée
jusqu’à 1 000 mm/s, avec une accélération de 10 000 mm/s² pour des flux de production efficaces -
Compatibilité multi-lasers
prend en charge les lasers à diode de 20 W, 40 W et 60 W ainsi qu’un module infrarouge de 2 W, pour une grande polyvalence dans le traitement des matériaux -
Système de positionnement précis
Le positionnement point-à-forme avec une caméra 12 MP/6K garantit un alignement précis -
Zone de travail optimisée
adapté aux peignes de taille standard (18 à 20 cm de longueur, environ 5,5 cm de largeur)
Considérations relatives à la sécurité et à l’espace de travail
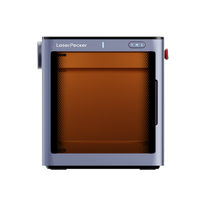
- Sécurité laser de classe 1 : le LX2 respecte les normes de sécurité de classe 1, ce qui le rend adapté à une utilisation en intérieur dans toute l’Europe
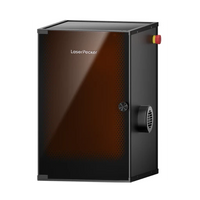
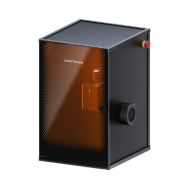
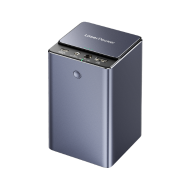
- Amélioration de la qualité de l’air : utilisé avec le purificateur de fumée de bureau LaserPecker, il aide à filtrer la fumée, les émanations et les odeurs générées pendant le fonctionnement, contribuant ainsi à un espace de travail plus propre et plus sûr
Grâce à sa combinaison de précision, de rapidité et de fonctions de sécurité, le LX2 est parfaitement adapté à la production de peignes en bois de haute qualité, avec des résultats réguliers et des finitions professionnelles.
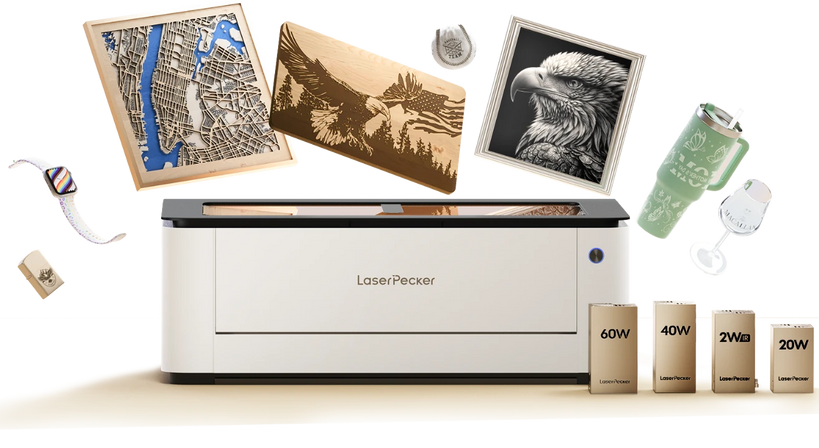
Partie 4 : Comment fabriquer un peigne en bois avec le LX2
La machine de gravure laser LX2 permet de fabriquer des peignes en bois rapidement et avec précision. Grâce à son contrôle avancé des mouvements, son positionnement assisté par caméra et ses modules laser flexibles, elle simplifie le processus pour les utilisateurs partout en Europe, des passionnés aux petits producteurs.
Étape 1 : Préparer et importer votre design
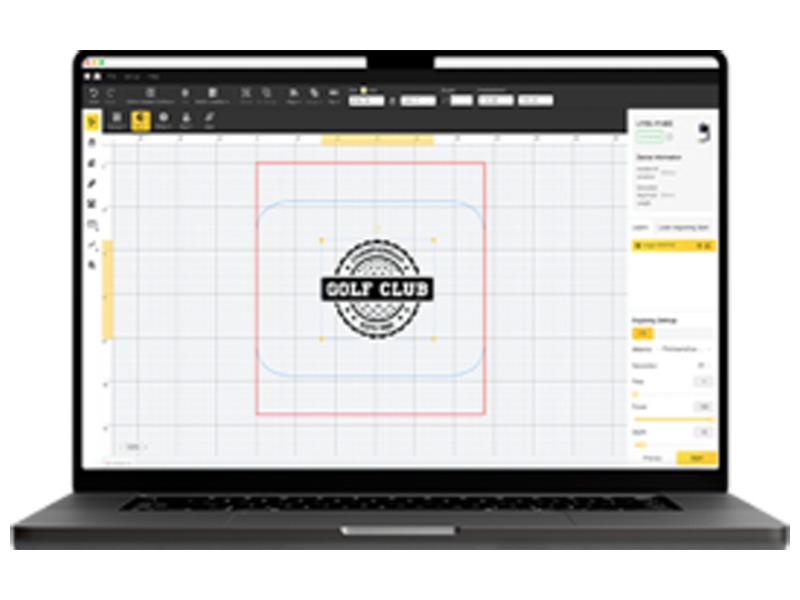
Concevez votre peigne à l’aide d’un logiciel tel qu’Illustrator, Inkscape ou LDS. Veillez à ce que l’espacement entre les dents soit régulier et que la forme soit optimisée.
Importez le design dans le système LX2. La caméra intégrée et le positionnement Point-to-Shape garantissent un placement précis sur le matériau.
Étape 2 : Choisir et fixer le matériau en bois
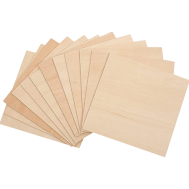
Choisissez des bois durs de haute qualité tels que le noyer, le cerisier, l’érable, le hêtre ou le bois de santal.
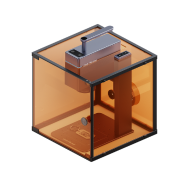
La structure à ouverture latérale du LX2 facilite le chargement des matériaux. Assurez-vous que la surface est plane et que le matériau est correctement positionné pour garantir une découpe précise.
Étape 3 : Configurer les paramètres de découpe
Réglez les paramètres de puissance, de vitesse et de passes en fonction de l’épaisseur et de la densité du matériau.
Il est recommandé d’effectuer une coupe test afin de vérifier la qualité des bords et la précision des dents avant de poursuivre.
Étape 4 : Effectuer la découpe
Le système haute vitesse du LX2 permet une découpe efficace et stable.
Sa puissance laser contrôlée réduit les marques de brûlure et produit des profils de dents nets et précis.
Étape 5 : Lisser les bords
Poncez légèrement les dents du peigne avec du papier abrasif fin pour améliorer le confort et obtenir une finition soignée.
Étape 6 : Gravure facultative
Utilisez le système de changement rapide de module du LX2 pour graver avec précision des logos, du texte ou des éléments décoratifs.
Étape 7 : Appliquer l’huile de finition
Appliquez des huiles naturelles telles que l’huile de lin ou l’huile de tung pour protéger le bois, mettre son veinage en valeur et améliorer sa durabilité.
Partie 5 : Conseils pour fabriquer un peigne en bois parfait
La fabrication d’un peigne en bois de qualité exige une attention particulière à la précision de la découpe et à la qualité de la finition. Les conseils suivants peuvent contribuer à garantir des résultats réguliers et professionnels :
Choisir des essences de bois adaptées
Choisissez des bois durs tels que le noyer, l’érable, le cerisier ou le hêtre pour une meilleure durabilité et des performances durables. Les bois tendres sont moins stables et plus susceptibles de se casser avec le temps.
Garantir une épaisseur suffisante des dents
Des dents trop fines risquent de se casser pendant l’utilisation.
Une épaisseur comprise entre 2,5 mm et 4 mm est recommandée, selon la densité du matériau, afin de trouver le juste équilibre entre solidité et facilité d’utilisation.
Réduire les marques de brûlure en surface
Pour améliorer la qualité de coupe et réduire le travail de finition :
- Utilisez des systèmes d’assistance pneumatique
- Appliquez du ruban de masquage avant la découpe
- Réglez finement les paramètres du laser pour des performances optimales
Cela permet d’obtenir des bords plus nets et un aspect plus soigné.
Maintenez une surface de découpe plane
Maintenez la surface du bois plane et correctement positionnée pendant la découpe. Un matériau irrégulier peut entraîner une profondeur de dents inégale et une précision réduite.
Lissez les dents du peigne
Après la découpe, poncez les dents avec du papier de verre fin afin d’améliorer le confort et d’éviter de tirer les cheveux pendant l’utilisation.
Appliquez une huile de finition pour le protéger
L’utilisation d’huiles naturelles telles que l’huile de lin ou l’huile d’abrasin met en valeur le veinage du bois, accroît sa durabilité et améliore sa résistance à l’humidité, pour un produit fini de meilleure qualité.
Partie 6 : FAQ sur la fabrication d’un peigne en bois
Q1. Pourquoi choisir un peigne en bois plutôt qu’un peigne en plastique ?
Les peignes en bois réduisent l’électricité statique, contribuant ainsi à prévenir les frisottis et à faciliter la mise en forme des cheveux. Ils sont doux pour le cuir chevelu et aident à répartir uniformément les huiles naturelles, améliorant ainsi la santé et la brillance des cheveux.
Ils sont également plus respectueux de l’environnement, car ils sont fabriqués à partir de matériaux naturels et ont une durée de vie plus longue.
Q2. Quels types de bois sont couramment utilisés pour les peignes en bois ?
Les essences couramment choisies comprennent le noyer, l’érable, le cerisier, le hêtre, le chêne, le palissandre et le bois de santal.
Les bois durs sont privilégiés, car ils offrent une meilleure résistance, une plus grande durabilité et une finition plus lisse après le ponçage.
Q3. Quelle est l’épaisseur idéale pour un peigne en bois ?
Un peigne en bois standard mesure généralement entre 5 mm et 8 mm d’épaisseur.
Cela garantit un bon équilibre entre résistance et confort, réduisant le risque de casse tout en conservant une grande facilité d’utilisation.
Q4. Les débutants peuvent-ils fabriquer un peigne en bois à l’aide d’une découpeuse laser ?
Oui, les débutants peuvent réussir à créer des peignes en bois à l’aide d’une découpeuse laser. Des machines comme la LX2 simplifient le processus grâce à un positionnement précis et à des commandes conviviales, ce qui les rend adaptées aux amateurs et à la production à petite échelle.
Q5. Comment obtenir des bords nets lors de la découpe du bois au laser ?
Pour améliorer la qualité des bords :
- Utilisez des systèmes d’assistance pneumatique
- Appliquez un masquage de protection
- Ajustez soigneusement les paramètres de découpe
Ces méthodes contribuent à réduire les marques de brûlure et à améliorer la finition finale.
Q6. Quelles caractéristiques de sécurité dois-je rechercher sur une découpeuse laser ?
Une machine fiable doit inclure des dispositifs de sécurité tels qu’un fonctionnement sous enceinte fermée et des niveaux de protection certifiés.
La LX2 respecte les normes de sécurité laser de classe 1 et peut être associée à un purificateur de fumée afin d’améliorer la qualité de l’air lors d’une utilisation en intérieur.
Conclusion
La fabrication de peignes en bois associe l’artisanat traditionnel à des méthodes de production modernes telles que la découpe au laser. Parmi les options disponibles, une découpeuse laser se distingue par sa capacité à offrir une qualité constante, une grande précision et une production efficace, notamment avec la LX2.
Avec les outils et les techniques appropriés, il devient facile de créer des peignes durables et raffinés pour un usage personnel, des produits personnalisés ou des opportunités commerciales à petite échelle sur le marché européen.