


Custom pins have become increasingly popular across Europe for creative branding, promotional products, and personalised gifts. Whether you're a hobbyist, designer, educator, or small business owner, there are several machine-based methods available for producing custom pins, including Cricut machines, pin makers, CNC cutters, and laser cutters.
Each option differs in terms of accuracy, material flexibility, production speed, and overall cost. Some methods are perfect for occasional DIY projects, while others are better suited to creating high-quality pins in larger quantities.
In this guide, we'll examine four popular pin-making methods, compare their strengths and limitations, and help you find the most suitable approach for your projects.

In this article:
Method 1: Make Custom Pins with Printable Shrink Plastic and a Cricut Machine
Printable shrink plastic and Cricut machines offer an accessible way to create custom pins for personal projects, craft markets, and small-scale businesses. The process combines digital printing with automated cutting, allowing creators to produce detailed pin designs with relatively little manual work.
Once printed and cut, the shrink plastic is heated, causing it to reduce in size while becoming thicker and more rigid. The result is a compact, colourful pin that is well suited to decorative and promotional applications.
Steps to Make Custom Pins with Printable Shrink Plastic and a Cricut Machine
- Create Your Design: Design your artwork using graphic or vector design software and adjust the dimensions to account for shrinkage.
- Print onto Shrink Plastic: Print the design onto printable shrink plastic sheets using a compatible printer.
- Load the Sheet into the Cricut Machine: Position the printed sheet on a cutting mat and load it into the Cricut machine.
- Cut the Design: Allow the machine to precisely cut the outline of the pin.
- Heat to Shrink: Bake the pieces according to the material instructions until they shrink and harden.
- Add a Protective Coating (Optional): Apply resin or a clear sealant to improve durability and create a glossy finish.
- Attach the Pin Back: Fix a pin backing to the finished piece using a suitable adhesive.
Advantages
- Cost-effective for beginners
- Produces colourful and detailed designs
- Suitable for short production runs
- Widely accessible materials and equipment
Limitations
- Not ideal for large-scale production
- Durability is lower than acrylic, wood, or metal alternatives
- Limited precision compared with CNC or laser-cut methods
For hobbyists and small businesses across Europe, this method provides an easy entry point into custom pin production without requiring industrial equipment.
Method 2: Make Custom Pins with a Pin Maker Machine
A pin maker machine, also known as a button press machine, offers a practical solution for producing custom pins with professional consistency. By combining printed artwork with metal pin components, the machine quickly assembles finished pins through a simple pressing process.
This method is widely used throughout Europe for promotional campaigns, educational events, sports clubs, and retail merchandise because it enables efficient production with predictable results.
Steps to Make Custom Pins with a Pin Maker Machine
- Create and Print the Design: Design your artwork and print it to match the size of the selected pin mould.
- Cut the Printed Artwork: Use a circle cutter or punch to create accurately sized inserts.
- Prepare the Components: Collect the metal shell, mylar film, and pin backing.
- Load the Machine: Position all components into the correct mould sections.
- Press and Assemble: Operate the machine to secure the parts together into a finished pin.
- Inspect the Finished Product: Remove the completed pin and check the quality of the assembly.
Advantages
- Suitable for medium and high-volume production
- Produces professional-looking results
- Easy to operate after initial setup
- Low cost per pin when producing larger quantities
Limitations
- Shape options are generally limited to mould designs
- Less flexibility for intricate custom shapes
- Material choices are restricted compared with laser-cut alternatives
- Additional moulds are often required for different pin sizes
For schools, associations, and businesses producing promotional pins in bulk, a pin maker machine offers an efficient and reliable solution.
Method 3: Make Custom Pins with a CNC Cutting Machine
CNC (Computer Numerical Control) cutting machines use computer-guided rotary tools to shape materials such as wood, acrylic, and selected metals. By following precise digital toolpaths, they can create custom pins with excellent consistency and repeatability.
Compared with simpler cutting methods, CNC machines are capable of producing thicker pins, engraved textures, and multi-level designs. This makes them particularly attractive for creators seeking a more premium appearance and durable finished products.
Steps to Make Custom Pins with a CNC Cutting Machine
- Create a Digital Vector Design: Design your pin artwork using vector software and prepare the file for machining.
- Import the File into CNC Software: Configure toolpaths, cutting depth, spindle speed, and other machining parameters.
- Secure the Material on the Machine Bed: Ensure the material is firmly fixed to prevent vibration or movement during cutting.
- Start the Cutting Process: Run the CNC machine to carve and cut the design according to the programmed instructions.
- Finish the Surface and Edges: Sand rough areas and refine the edges to achieve a cleaner appearance.
- Attach Pin Hardware and Protective Finishes: Add the pin backing and apply coatings if required.
Advantages
- Supports a variety of rigid materials
- Suitable for dimensional and engraved designs
- High repeatability for small-batch production
- Creates durable wooden and acrylic pins
Limitations
- Slower production speed than many laser-cutting workflows
- Fine details can be restricted by tool size
- Cutting tools require periodic replacement
- Additional finishing work is commonly needed
Depending on the machine and tooling used, CNC cutting tolerances generally range from ±0.1 mm to ±0.3 mm. Smaller cutting bits can improve detail resolution, but they typically increase machining time and accelerate tool wear.
For makers and small businesses across Europe, CNC cutting offers a professional approach to producing custom pins, especially when working with thicker materials and engraved designs.
Method 4: Make Custom Pins with a Laser Cutting Machine
Laser cutting has become a preferred solution across Europe for producing high-quality custom pins with exceptional precision and flexibility. Unlike mechanical cutting methods, laser cutters remove material without physical contact, enabling complex geometries, fine engraving, and clean edges with minimal finishing work.
For creators producing acrylic, wooden, leather, or engraved pins, laser cutting offers significantly greater design freedom than Cricut machines, button presses, or CNC routers.
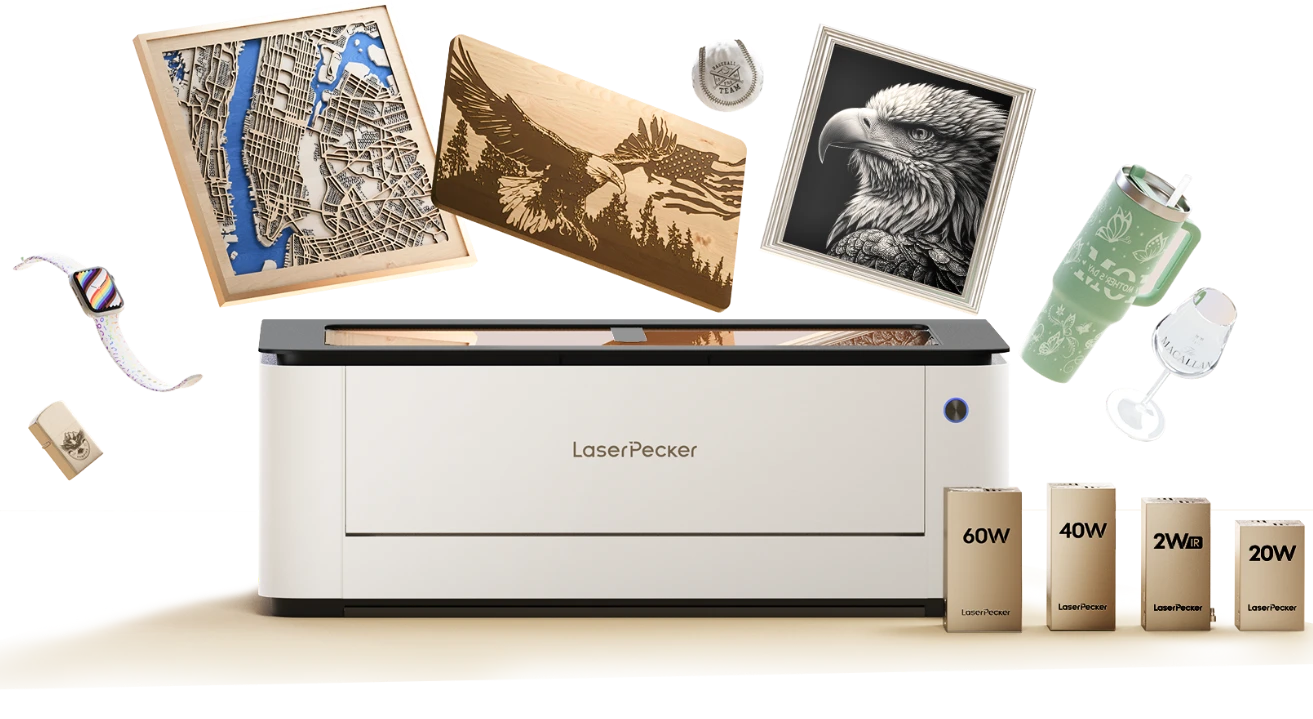
Recommended Laser Cutting Machine for Custom Pins: LaserPecker LX2
For hobbyists, makers, and small businesses throughout the EU, the LaserPecker LX2 provides a compact yet powerful solution for creating custom pins. Its ability to perform both cutting and engraving within a single workflow helps simplify production while maintaining professional-quality results.
-
Ultra-Fine Laser Spot
The LX2 produces highly detailed cuts and engravings, making it suitable for intricate artwork, small lettering, and complex logos often used in custom pin production. -
Dual-Laser Technology (450nm Diode + 1064nm Infrared Laser)
The dual-laser system expands material compatibility, allowing users to process acrylic, wood, leather, coated metals, and painted materials. This versatility enables the production of multiple pin styles using a single machine. -
Precision-Controlled Production
Software-guided cutting and engraving ensure excellent repeatability, which is particularly valuable when producing custom pins for online shops, events, or commercial orders. -
Large Processing Area
With a maximum working area of 500 mm × 305 mm, multiple pin designs can be processed in one run, improving productivity and workflow efficiency. -
Class 1 Laser Safety Design
Safety remains an important consideration for home workshops and small studios. The LX2 features Class 1 Laser Safety, helping provide a user-friendly operating environment for indoor use. -
Enhanced Indoor Air Quality with the LaserPecker Desktop Smoke Purifier
When processing materials, smoke and odours may be generated. The LaserPecker Desktop Smoke Purifier can be paired with the LX2 to help filter particles and fumes, making laser cutting and engraving more suitable for indoor environments.
Steps to Make Custom Pins with Laser Cutting
- Design Creation: Create your pin design using vector software such as Illustrator.
- Prepare Material: Place and secure the material (acrylic, wood, etc.) on the laser bed.
- Adjust Laser Settings: Set power, speed, and pass count based on material type and thickness.
- Cut the Outline: Use the laser to precisely cut the pin shape.
- Engrave Details (Optional): Add text, patterns, or logos directly onto the surface.
- Remove Protective Film: Clean off residue or protective layers after processing.
- Attach Pin Hardware: Secure pin backs using adhesive or epoxy.
- Quality Check: Inspect edges and engraving quality before final use or packaging.
Laser cutting typically achieves a kerf width of approximately 0.1–0.2 mm, allowing for extremely fine geometric details beyond the capability of mechanical cutting methods.
For best results, ensure proper ventilation and carefully calibrated power settings to avoid material burning and maintain consistent engraving depth.
FAQs: Hot Questions about Making Custom Pins
Q1. What is the easiest way to make custom pins for beginners?
For beginners, shrink plastic and button maker machines are among the simplest options. However, creators who want greater design freedom and more professional-looking results often choose desktop laser cutters because they can cut and engrave a wide range of materials.
Q2. Which materials are commonly used for custom pins?
Popular materials include acrylic, plywood, MDF, leather, coated metals, and shrink plastic. Acrylic and wood remain particularly popular because they combine durability, visual appeal, and compatibility with laser cutting technology.
Q3. How much does it cost to start making custom pins?
The cost depends on the production method. Basic DIY methods can be very affordable, while laser-cutting setups require a higher initial investment. However, laser cutting often reduces production time and material waste, making it cost-effective for frequent use.
Q4. What types of pins can be made with a laser cutter?
Laser cutters are ideal for acrylic pins, wooden pins, engraved leather pins, layered pins, and custom-shaped promotional pins. They are especially effective for detailed artwork, logos, and small text.
Q5. Do I need special software to create laser-cut pin designs?
Yes. Vector design software is typically required to create cutting and engraving paths. Common file formats include SVG, DXF, and AI. Most modern laser cutters also include dedicated software for preparing and managing projects.
Q6. Is a desktop laser cutter suitable for indoor use?
Yes, provided appropriate safety measures are followed. Machines such as the LaserPecker LX2 feature Class 1 Laser Safety, and when paired with the LaserPecker Desktop Smoke Purifier, they can help reduce fumes and odours generated during engraving and cutting, making them more suitable for indoor workshops and creative spaces.
Conclusion
The best method for making custom pins depends on your materials, design requirements, and production goals. While different techniques suit different applications, laser cutting offers an excellent combination of precision, flexibility, and efficiency.
For hobbyists, makers, and small businesses creating personalised pins, laser cutting makes it easy to produce detailed designs, consistent results, and professional-quality products across a wide range of materials.


