


A picture mat board adds a professional border around artwork while helping protect photos, prints, and documents from touching the glazing surface. Accurate cutting is essential for creating clean openings, sharp corners, and high-quality framing results.
Today, picture mat boards can be cut using several different techniques, from traditional manual tools to dedicated mat cutters and advanced laser cutting systems. Each option varies in terms of precision, cost, efficiency, and learning curve.
In this guide, we'll explore four common methods, compare their strengths and weaknesses, and help you find the most suitable solution for your creative or framing needs.

In this article:
Method 1: Cut Picture Mat Board by Hand
Hand cutting is a practical and budget-friendly method for creating custom picture mat boards. It is widely used by hobbyists, students, and DIY framers who only need to produce occasional mats without purchasing dedicated equipment.
Tools You'll Need
- Picture mat board
- Metal ruler or straight edge
- Craft knife
- Pencil
- Cutting mat
Steps to Cut Picture Mat Board by Hand
-
Mark the Dimensions
Measure and mark both the outer border and inner opening of the mat board using a ruler and pencil. -
Secure the Straight Edge
Position a metal ruler along the cutting line to guide the blade and improve accuracy. -
Cut the Outer Shape
Make several controlled passes with the knife until the board is fully cut through. -
Create the Window Opening
Cut along the marked inner lines. A bevelled edge can help achieve a cleaner and more professional appearance. -
Remove the Inner Section
Carefully lift out the centre portion once all cuts are complete. -
Finish the Edges
Remove any rough areas and check that all sides are clean and even.
Pros
- Affordable and accessible for beginners
- No specialised machinery required
- Suitable for one-off framing projects
Cons
- Accuracy depends heavily on user skill
- Can be slow for multiple pieces
- Higher risk of uneven cuts and corner imperfections
- Not ideal for complex shapes or decorative designs
For occasional framing projects, manual cutting remains a useful option. However, users looking for greater precision, repeatability, and efficiency often move to dedicated mat cutters or laser cutting systems.
Method 2: Cut Picture Mat Board with a Mat Cutter
A mat cutter provides a more accurate and efficient way to cut picture mat boards than standard hand tools. It is commonly used by photographers, artists, and framing professionals who need consistent results and clean bevelled openings.
Tools You'll Need
- Picture mat board
- Mat cutter
- Pencil
- Measuring ruler
- Flat cutting surface
Steps to Cut Picture Mat Board with a Mat Cutter
-
Mark the Layout
Measure and mark the outer dimensions and inner window opening on the back of the board. -
Configure the Cutter
Adjust the guide rail and blade settings to match the required dimensions and material thickness. -
Align the Board
Position the mat board securely against the guides to maintain straight and accurate cuts. -
Cut Each Side
Use steady pressure to cut each side of the window opening. The cutter helps create uniform bevelled edges. -
Remove the Centre Piece
Carefully lift out the cut section after all sides have been completed. -
Review the Results
Check the corners and edges for cleanliness and accuracy.
Pros
- Greater precision than manual cutting
- Consistent bevelled edges
- Efficient for multiple framing projects
- Suitable for both hobby and professional use
Cons
- Requires dedicated equipment
- Primarily designed for straight cuts
- Limited flexibility for decorative or complex designs
- Blade wear can affect cutting quality over time
A mat cutter is an excellent solution for producing professional-looking picture mats. However, users who require custom shapes, detailed designs, or higher production efficiency often look towards laser cutting technology for greater versatility.
Method 3: Cut Picture Mat Board with a Laser Cutter
Laser cutting offers the highest level of precision and versatility when working with picture mat boards. By following digital design paths, a laser cutter can create accurate openings, clean edges, and repeatable results that are difficult to achieve with manual tools.
This approach is particularly valuable for detailed designs, multiple-window mats, customised layouts, and professional framing applications.
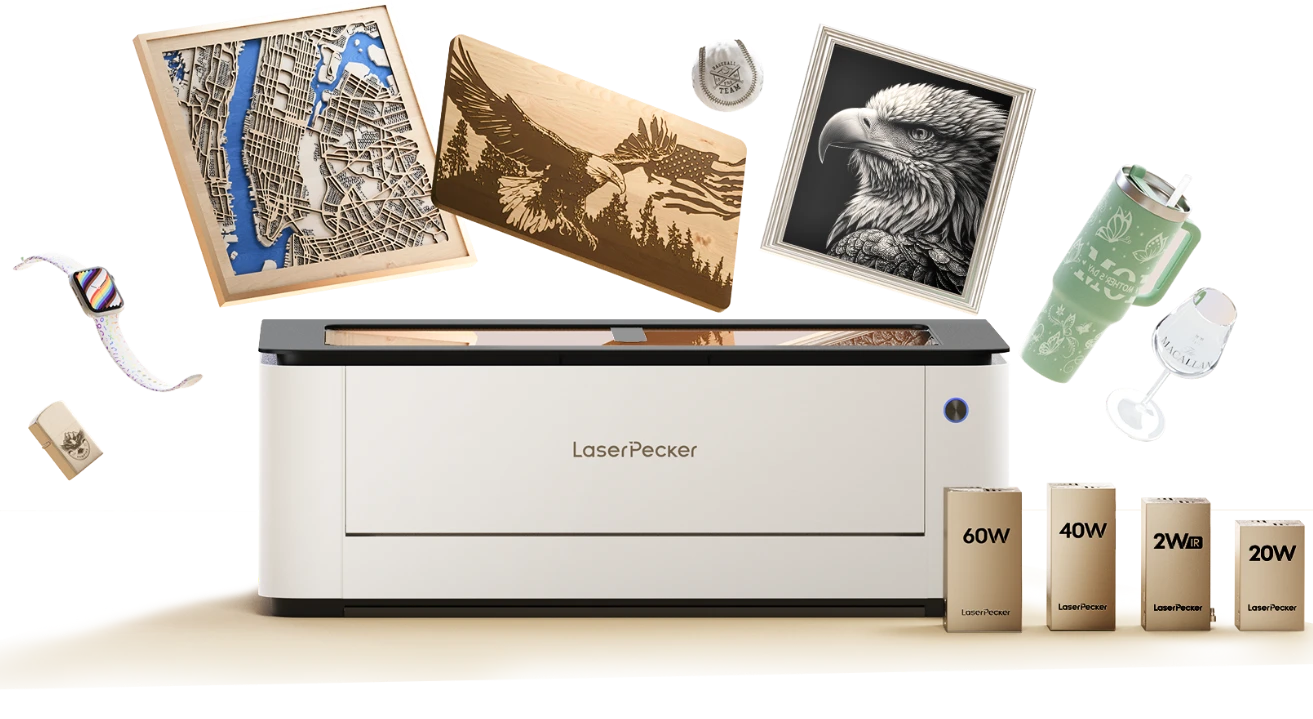
Recommended Laser Cutter for Picture Mat Board: LaserPecker LX2
For creators, photographers, artists, and small businesses across Europe, the LaserPecker LX2 provides an efficient solution for producing professional-quality mat boards with consistent accuracy.
Its compact desktop design combines laser cutting and engraving capabilities, helping users move seamlessly from digital design to finished products.
-
Ultra-Fine Laser Spot
The LX2's ultra-fine laser spot enables precise cutting with clean edge quality, making it suitable for detailed framing layouts and decorative mat designs. -
Dual-Laser System
The combination of a 450nm diode laser and a 1064nm infrared laser allows users to process a variety of materials beyond mat board, including wood, acrylic, leather, and selected metals. -
Consistent Digital Precision
Software-controlled cutting paths ensure every mat is produced with the same dimensions and alignment, which is particularly beneficial for commercial framing projects and repeat production. -
Large Working Area
With a working area of up to 500 mm × 305 mm, users can cut larger boards or process multiple pieces in a single workflow. -
Class 1 Laser Safety for Indoor Workspaces
Many European users prioritise workplace safety when selecting creative equipment. The LX2 is designed with Class 1 Laser Safety, helping provide a safer operating experience for home studios, workshops, and creative businesses.
To further improve indoor working conditions, the LX2 can be used together with the LaserPecker Desktop Smoke Purifier, which helps remove smoke, odours, and airborne particles generated during cutting and engraving processes.
Steps to Cut Picture Mat Board with a Laser Cutter
-
Design the Layout
Create the mat board dimensions and window openings using vector design software. -
Import the File
Load the design into the laser software and position it within the working area. -
Prepare the Material
Place the mat board securely on the work surface. -
Configure the Settings
Adjust power, speed, and pass settings according to the material thickness. -
Start the Laser Job
Begin the cutting process and allow the machine to follow the programmed path. -
Inspect the Finished Mat
Remove the completed mat board and verify the quality of the cuts.
Pros
- Exceptional cutting precision
- Ideal for customised and complex designs
- High repeatability for batch production
- Efficient workflow with reduced manual effort
- Supports both cutting and engraving
- Compatible with a wide range of materials
Cons
- Higher upfront cost than traditional cutting methods
- Requires familiarity with design software
For users who need professional results, design flexibility, and production efficiency, laser cutting provides the most advanced solution for picture mat board fabrication.
FAQs: Common Questions About Cutting Picture Mat Board
Q1. Can I use a utility knife to cut picture mat board?
Yes, a utility knife is suitable for simple straight cuts and occasional DIY framing projects. A sharp blade and careful technique are essential for achieving clean results.
For more accurate window openings and bevelled edges, dedicated cutting tools are generally recommended.
Q2. Which mat board thickness is best for framing?
The most common choices are 4-ply and 8-ply mat boards.
- 4-ply boards are suitable for everyday framing applications.
- 8-ply boards provide a deeper border and a more premium presentation, often used for exhibitions and gallery displays.
The best choice depends on the artwork, frame depth, and preferred appearance.
Q3. What is the most accurate way to cut picture mat board?
Laser cutting is generally considered the most accurate method because it follows digital cutting paths and eliminates many of the inconsistencies associated with manual cutting.
For standard framing projects, mat cutters also provide excellent accuracy and professional-looking bevelled edges.
Q4. Can beginners cut picture mat board successfully?
Yes. Beginners can achieve good results using manual cutting tools, provided they measure carefully and use sharp blades.
Many hobbyists start with hand-cutting methods before upgrading to mat cutters or laser cutters as their projects become more frequent or complex.
Q5. What materials can be cut alongside picture mat board on a laser cutter?
Many modern laser cutters can process a variety of materials commonly used in framing and display projects, including:
- Wood
- Acrylic
- Leather
- Cardboard
- Paper-based materials
This makes laser cutting particularly useful for customised framing, layered artwork, and decorative display projects.
Q6. Are laser cutters suitable for small businesses and professional framing studios?
Yes. Laser cutters are widely used by photographers, artists, sign makers, and framing businesses because they offer consistent results, fast production speeds, and the ability to create customised designs.
For users across Europe, compact desktop systems can provide a practical balance between professional performance, workspace efficiency, and operational safety.
Conclusion
There are several effective ways to cut picture mat board, each suited to different budgets, skill levels, and project requirements. Hand-cutting is an accessible starting point for beginners, while mat cutters offer greater consistency and professional-looking bevelled edges.
For users seeking the highest level of accuracy, efficiency, and design flexibility, laser cutting stands out as the most advanced option. It enables precise digital cutting, supports customised layouts, and delivers consistent results across single pieces and batch production runs.
For creators, photographers, artists, and small businesses across Europe, the LaserPecker LX2 offers a practical solution for producing professional-quality picture ats. Its combination of precision cutting, engraving capability, software-controlled workflow, and Class 1 Laser Safety makes it well suited to modern creative studios and framing applications.


