


Fridge magnets can be both decorative and practical, making them popular for home décor, personalised gifts, and small creative businesses across Europe. Today, makers use a variety of tools to create custom fridge magnets, including Cricut machines, resin casting kits, 3D printers, and laser engraving machines.
Each method differs in production speed, material options, precision, and ease of use. Some are suitable for hobby projects, while others work better for professional-looking products sold online or at local markets.
In this guide, we explore six common methods for making fridge magnets, compare their advantages and limitations, and explain why laser engraving and laser cutting are becoming a preferred solution for high-quality customised magnets.

In this guide:
- Part 1: 6 Popular Methods for Making Fridge Magnets
- Method 1: Manual Cutting
- Method 2: Magnet Making Machines
- Method 3: Using a Cricut Machine
- Method 4: 3D Printing
- Method 5: Resin Molding
- Method 6: Laser Engraving and Laser Cutting
- Part 2: Why Laser Engraving & Laser Cutting Are a Good Choice for Fridge Magnet Making
- Part 3: How to Make Fridge Magnets with Laser Engraving and Laser Cutting
- FAQs: Hot Questions about Making Fridge Magnets
Part 1: 6 Popular Methods for Making Fridge Magnets
Method 1: Make Fridge Magnets with Manual Cutting
Manual cutting is one of the simplest ways to create custom fridge magnets at home. This method uses basic materials such as cardboard, felt, foam, or wood, making it suitable for DIY hobby projects and simple decorative magnets.
Because everything is cut and assembled by hand, this approach requires minimal equipment but offers limited precision and production consistency.
Steps to Make Fridge Magnets with Manual Cutting
- Draw your design onto the chosen material.
- Cut out the shape using scissors or a craft knife.
- Decorate the surface using paints, stickers, or markers.
- Glue a small magnet onto the back.
Pros
- Low equipment cost
- Easy for beginners
- Suitable for simple DIY crafts
Cons
- Lower precision
- Difficult to replicate identical designs
- Slow for larger quantities
This method is best for casual DIY projects and handmade decorative magnets.
Method 2: Make Fridge Magnets with a Magnet Making Machine
Magnet making machines are widely used for producing promotional magnets, tourist souvenirs, and photo magnets in larger quantities. The process involves printing a design before pressing the layers together using a dedicated magnet press machine.
This method is efficient for batch production and creates consistent results.
Steps to Make Fridge Magnets with a Magnet Making Machine
- Design your artwork digitally.
- Print the design onto paper or vinyl.
- Trim the printed design to size.
- Place the layers into the machine mould.
- Press the machine to seal the components together.
- Add the magnetic backing.
Pros
- Fast production workflow
- Consistent finished products
- Suitable for repeated designs
Cons
- Limited material flexibility
- Mainly suitable for flat printed graphics
- Less suitable for engraved effects
This method is ideal for producing large quantities of printed fridge magnets.
Method 3: Make Fridge Magnets with a Cricut Machine
Cricut machines are popular among DIY creators and small handmade businesses because they can cut intricate designs from vinyl, cardstock, magnetic sheets, and thin wood.
The machine follows digital cutting files, allowing users to create decorative and layered magnet designs with high precision.
Steps to Make Fridge Magnets with a Cricut Machine
- Upload or create a design in Cricut Design Space.
- Choose the cutting material.
- Load the material onto the cutting mat.
- Insert the mat into the machine.
- Allow the Cricut machine to cut the design automatically.
- Attach magnetic backing if necessary.
Pros
- Precise digital cutting
- Good for decorative designs
- Suitable for customised small batches
Cons
- Limited to thinner materials
- Requires Cricut software skills
- Cannot engrave thicker materials effectively
This method works well for detailed decorative magnets and craft-based products.
Method 4: Make Fridge Magnets with 3D Printing
3D printing allows users to create highly customised fridge magnets with raised textures, logos, and complex structures. Objects are built layer by layer using digital models and printing materials such as PLA or resin.
This method is especially suitable for creative designs that are difficult to produce with traditional cutting tools.
Steps to Make Fridge Magnets with 3D Printing
- Create or download a 3D design.
- Export the file as STL.
- Import the file into slicing software.
- Configure the print settings.
- Print the model using a 3D printer.
- Attach a magnet onto the back.
Pros
- Excellent for complex geometry
- Highly customisable
- Suitable for novelty products
Cons
- Slower production speed
- Requires 3D printing knowledge
- Additional finishing may be needed
This method is ideal for customised and creative magnet designs.
Method 5: Make Fridge Magnets with Resin Moulding
Resin moulding is commonly used to create colourful decorative fridge magnets with embedded textures and artistic effects. Makers can add pigments, dried flowers, glitter, or miniature decorations directly into the resin.
Because resin requires curing and ventilation, this method is better suited to dedicated crafting spaces.
Steps to Make Fridge Magnets with Resin Moulding
- Prepare a silicone mould.
- Mix the resin correctly.
- Pour the resin into the mould.
- Add decorative elements if desired.
- Allow the resin to cure completely.
- Remove the piece and attach a magnet.
Pros
- Visually attractive finishes
- Strong decorative potential
- Suitable for artistic products
Cons
- Requires curing time
- Ventilation is important
- Less efficient for rapid production
This method is ideal for decorative handmade fridge magnets.
Method 6: Make Fridge Magnets with Laser Engraving and Laser Cutting
Laser engraving and laser cutting are advanced methods for producing high-quality customised fridge magnets. These technologies combine accurate cutting with detailed engraving, making them suitable for hobby projects, personalised gifts, and small creative businesses across Europe.
Laser cutting creates clean shapes from materials such as acrylic, wood, MDF, leather, or cardboard. Laser engraving can then add names, logos, illustrations, patterns, or QR codes directly onto the material surface.
Compared with manual crafting methods, laser engraving and laser cutting machines offer faster production, greater precision, and more professional results.
Steps to Make Fridge Magnets with Laser Engraving and Laser Cutting
- Design the artwork using vector software.
- Select a suitable material.
- Use laser cutting to create the shape.
- Apply laser engraving for decorative details.
- Attach magnetic backing to the finished piece.
Common Magnet Attachment Methods
Groove Method
Cut a recessed groove on the back to insert a strip magnet neatly into the surface.
Adhesive Method
Use adhesive-backed magnetic sheets or discs for fast assembly.
Pros
- Extremely accurate cutting and engraving
- Supports multiple materials
- Professional-quality results
- Excellent for personalised products and small businesses
Cons
- Higher initial investment
- Requires basic design software knowledge
This method is one of the most efficient solutions for producing customised fridge magnets with professional detail.
Comparison Table of Fridge Magnet Making Methods
| Method | Precision | Materials | Setup Cost | Batch Consistency | Custom Detail Level | Best For |
|---|---|---|---|---|---|---|
| Manual Cutting | Low | Wood, cardboard, felt, foam | Very Low | Low | Medium | DIY crafts |
| Magnet Making Machine | Medium | Paper, vinyl, metal | Medium | High | High | Promotional magnets |
| Cricut Machine | High | Vinyl, cardstock, thin wood | Medium | High | High | Decorative designs |
| 3D Printing | High | PLA, ABS, resin | Medium | High | Very High | Complex custom magnets |
| Resin Moulding | Medium | Resin, silicone moulds | Low | Medium | High | Artistic handmade magnets |
| Laser Engraving & Cutting | Very High | Wood, acrylic, MDF, leather | Medium | Very High | Very High | Personalised magnets & small businesses |
Part 2: Why Laser Engraving & Cutting Are a Good Choice for Making Fridge Magnets?
Laser engraving and laser cutting are becoming increasingly popular for producing customised fridge magnets because they offer excellent precision, efficient production, and flexible design possibilities. Compared with traditional handcrafting methods, laser machines can create cleaner cuts and more detailed engraving while reducing manual work.
For hobbyists, creative workshops, and small businesses across Europe, laser technology provides a practical way to produce both personalised designs and consistent batch products.
Reason 1: Precise Engraving for Small Details
Fridge magnets are usually compact, which means engraving accuracy is important. Laser engraving machines can produce detailed text, logos, illustrations, decorative patterns, and surface textures on materials such as wood, acrylic, MDF, leather, and coated metals.
This precision helps create magnets with a professional appearance and sharp visual detail.
Reason 2: Faster Production Workflow
After preparing the digital design, laser cutters and engravers can process multiple fridge magnets efficiently within the same workflow. Cutting and engraving can both be completed automatically, reducing production time and improving consistency.
This is especially useful for:
- Small creative businesses
- Handmade product shops
- Online personalised gift sellers
- Small-batch production
Reason 3: Flexible Material Options
Laser machines support many materials commonly used for custom fridge magnets, including:
- Wood
- MDF
- Acrylic
- Plywood
- Leather
- Cardboard
- Magnetic sheets
This allows creators to experiment with different colours, finishes, and design styles.
Reason 4: Simple Customisation
Because laser engraving uses digital design files, each magnet can easily be customised without changing tools or moulds.
Users can quickly personalise magnets with:
- Names
- Logos
- QR codes
- Decorative artwork
- Custom messages
- Seasonal themes
This flexibility makes laser engraving particularly suitable for personalised products and gift items.
Reason 5: Consistent Quality for Repeat Production
Laser engraving and cutting provide highly consistent results across multiple pieces. Shapes, engraving depth, and alignment remain accurate throughout production, which is important for creators selling products online or producing repeat orders.
Compared with manual methods, laser systems improve:
- Production consistency
- Workflow efficiency
- Product presentation
- Overall finishing quality
Overall, laser engraving and laser cutting offer one of the most effective methods for producing professional-quality fridge magnets with customised designs.
Recommended Laser Engraver & Cutter for Fridge Magnet Projects
For creators who want cleaner cuts, detailed engraving, and more efficient production, a desktop laser engraver can significantly improve the fridge magnet making process.
One suitable option for hobby users and small creative workshops is the LaserPecker LX2 desktop laser engraver and cutter.
Key Advantages of the LaserPecker LX2 for Fridge Magnet Projects
Detailed Engraving Performance
The LX2 can engrave detailed patterns, text, illustrations, and logos onto materials such as wood, acrylic, leather, and coated metal surfaces, making it suitable for personalised magnet projects.
Large Working Area
With a workspace of approximately 500 × 305 mm, users can process multiple magnets in a single production batch, helping improve workflow efficiency.
Fast Processing Speed
The LX2 supports engraving speeds up to 1000 mm/s, allowing creators to complete projects more quickly while maintaining engraving accuracy.
Interchangeable Laser Modules
The machine supports 20W, 40W, and infrared laser modules, giving users more flexibility when working with different materials and engraving applications.
Camera-Assisted Positioning
A built-in camera system helps align designs accurately on the material surface, reducing positioning errors during engraving and cutting.
Class 1 Laser Safety Design
For indoor workshops and home crafting environments, safety is an important consideration. The LaserPecker LX2 features a fully enclosed Class 1 Laser Safety system with multiple built-in safety protections, making it suitable for indoor creative workspaces.
Cleaner Indoor Air During Engraving
The LX2 can also be used together with the LaserPecker Desktop Smoke Purifier. This accessory helps filter smoke, fumes, and odours generated during engraving and cutting, helping maintain a cleaner indoor working environment.
For creators looking to produce customised fridge magnets with professional detail and efficient production, laser engraving and laser cutting provide a highly versatile solution.
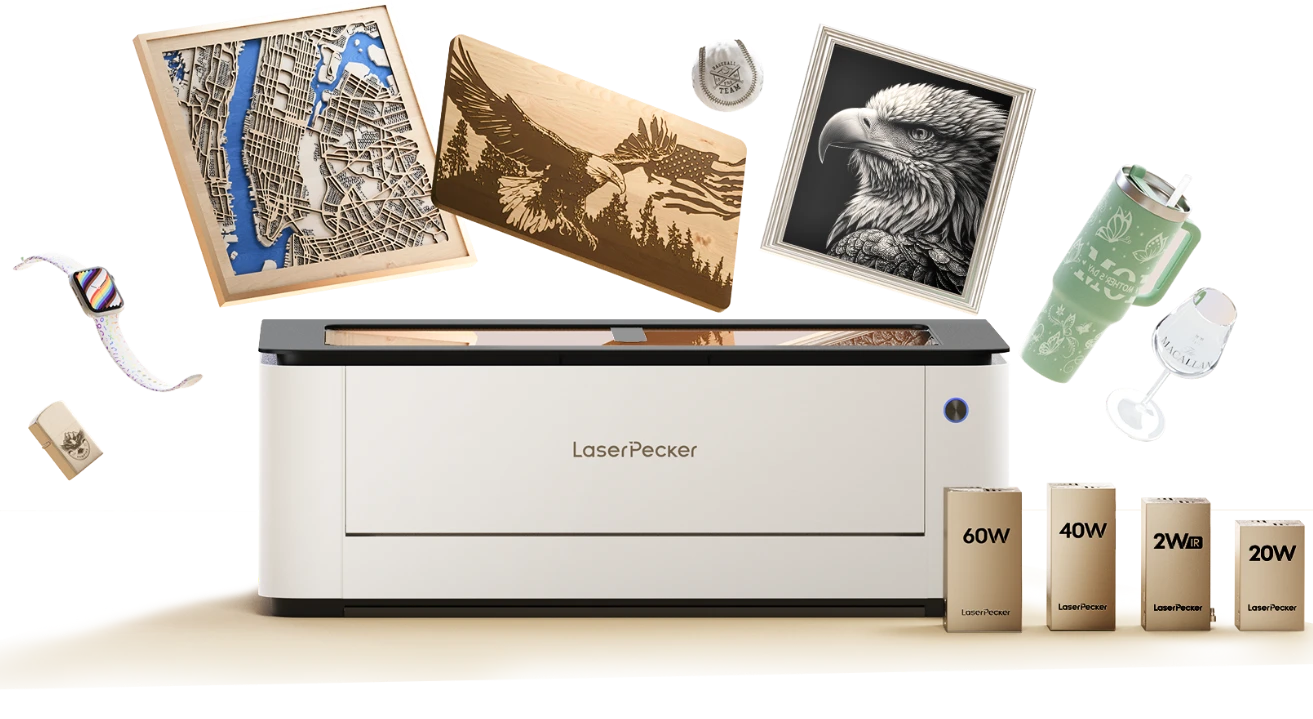
Part 3: How to Make Fridge Magnets with Laser Engraving and Laser Cutting
This guide explains how to create wooden fridge magnets using laser engraving and laser cutting with the LaserPecker LX2. By combining both processes in a single workflow, creators can produce customised magnets with detailed engraving, accurate cutting, and consistent finishing quality.
This method is suitable for:
- Decorative home accessories
- Seasonal ornaments
- Personalised gifts
- Handmade product shops
- Small creative businesses
What You'll Need
- Thin plywood or basswood (approximately 2–4 mm thick)
- Small magnets (round, strip, or rectangular magnets)
- Optional epoxy or super glue
- Vector design software
- LaserPecker LX2 laser engraver and cutter
- Optional finishing materials:
- Sandpaper
- Wood oil
- Paint or clear coating
Optional Magnet Attachment Methods
Recessed Slot Method
Design a recessed area on the back of the magnet piece so the magnetic strip fits neatly into the wood surface.
Adhesive Method
Use epoxy or super glue to attach the magnet directly onto the back.
Step-by-Step Guide
Step 1: Create the Design File
Begin by creating a digital vector design for your fridge magnet. The design may include:
- Decorative illustrations
- Holiday themes
- Business branding
- Personalised names
- Custom text or patterns
For easier workflow management, keep engraving details and cutting outlines on separate layers.
Step 2: Prepare the Wood Surface
Place the plywood or basswood sheet flat inside the LaserPecker LX2 working area. The built-in camera alignment system helps position designs accurately on the material surface, which is especially useful for aligning artwork or processing multiple magnets in one batch.
For indoor workshops and creative studios, the LX2’s fully enclosed Class 1 Laser Safety system also provides additional safety protection during engraving and cutting.
Step 3: Configure the Laser Settings
Adjust the laser power and speed settings according to the wood thickness and desired engraving depth.
Typically:
- Engraving uses lower power and faster speed
- Cutting uses higher power and slower speed
If needed, test the settings on scrap material before processing the final design.
Step 4: Engrave and Cut the Magnet
If your design includes engraved details, complete the engraving process first before cutting the outer shape. This helps maintain material stability during engraving.
Laser engraving can add:
- Logos
- Decorative textures
- Names
- Illustrations
- QR codes
- Personalised artwork
The LX2 allows highly detailed engraving and clean cutting edges, even on small decorative magnets.
Step 5: Finish the Wooden Surface
After cutting, lightly sand the edges to smooth rough areas or remove light burn residue.
Optional finishing methods include:
- Wood oil for a natural appearance
- Paint for colourful decorative designs
- Clear protective coating
Some creators also prefer leaving the natural wood texture visible for a handmade aesthetic.
Step 6: Install the Magnet
Adhesive Method
Glue the magnet onto the back surface using epoxy or super glue.
Recessed Slot Method
If a recessed slot was included in the design, insert the magnet into the groove so it sits flush with the surface.
This creates a cleaner and more professional-looking finish.
Benefits of This Laser Workflow
Compared with traditional manual crafting methods, laser engraving and laser cutting offer:
- Higher precision
- More detailed engraving
- Faster production speed
- Better batch consistency
- Easier customisation
This makes laser technology particularly suitable for creators producing customised fridge magnets for online sales, gift products, or small-batch production.
For indoor creative environments, the LaserPecker LX2 can also be paired with the LaserPecker Desktop Smoke Purifier, which helps filter smoke, fumes, and odours generated during engraving and cutting. This helps maintain a cleaner and more comfortable indoor workspace during regular use.
FAQs: Hot Questions about Making Fridge Magnets
Q1: What Materials Can Be Used for Custom Fridge Magnets?
Custom fridge magnets can be made using materials such as wood, acrylic, MDF, resin, cardboard, leather, and magnetic sheets.
For laser engraving and laser cutting projects, wood and acrylic are especially popular because they provide detailed engraving results and clean cutting quality. The best material depends on the desired appearance, durability, and production method.
Q2: Is Laser Engraving Safe for Home Crafting?
Yes. Laser engraving can be suitable for home workshops and indoor creative spaces when proper safety measures are followed.
Machines such as the LaserPecker LX2 include a fully enclosed Class 1 Laser Safety system designed for safer indoor operation. Many creators also use a smoke purifier to help reduce fumes and odours generated during engraving and cutting.
Proper ventilation and correct material settings are still important for safe operation.
Q3: Which Adhesive Is Best for Fridge Magnets?
Epoxy adhesive and super glue are commonly used for attaching magnets securely to wood, acrylic, or resin surfaces.
For lightweight magnets, adhesive-backed magnetic sheets can also provide a quick and convenient solution.
The best adhesive depends on the weight of the finished magnet and the surface material being used.
Q4: Can Laser Engraving Be Used for Small Business Production?
Yes. Laser engraving is widely used by small creative businesses because it allows efficient production of customised products with consistent quality.
Laser engraving machines are especially useful for:
- Personalised gifts
- Handmade home décor
- Online product shops
- Small-batch production
- Seasonal product collections
Because designs are digitally controlled, creators can easily customise products without additional moulds or tools.
Q5: What Is the Best Wood for Laser-Cut Fridge Magnets?
Plywood, basswood, and MDF are among the most commonly used materials for laser-cut fridge magnets.
Basswood is popular because it engraves cleanly and has a smooth surface, while plywood offers good durability and natural wood texture. MDF can also produce consistent engraving results at a lower material cost.
For best results, many creators choose wood sheets between 2–4 mm thick.
Q6: Why Are Laser-Cut Fridge Magnets Popular?
Laser-cut fridge magnets are popular because they combine detailed engraving, accurate cutting, and easy customisation within a single workflow.
Compared with manual crafting methods, laser engraving offers:
- Higher precision
- Faster production
- Cleaner finishing quality
- Better batch consistency
- Easier product personalisation
These advantages make laser engraving especially suitable for customised gifts, decorative products, and small creative businesses across Europe.
Conclusion
Custom fridge magnets can be created using a variety of methods, each suited to different creative and production needs. Choosing the right approach depends on your preferred materials, budget, and level of customisation.
For makers seeking precise designs, clean finishes, and reliable repeatability, laser engraving and laser cutting remain an excellent choice. They make it easy to produce personalised fridge magnets with professional-quality results.


