


Cardboard vehicles are becoming more common in schools, maker communities, and DIY workshops across Europe. From simple toy cars to detailed transport truck models, cardboard is a low-cost and versatile material that allows makers to turn creative ideas into functional projects. Whether you are building for learning, hobbies, or small-scale product development, choosing the right construction method can improve efficiency and final build quality.
This guide explores the advantages of using cardboard for vehicle models and compares two popular production methods, including laser cutting for cleaner edges and higher precision.

In this article:
- Part 1: Why Use Cardboard to Make Vehicles?
- Part 2: Two Methods to Make Cardboard Vehicles
- Method 1: Handcrafting
- Method 2: Laser Cutting
- Part 3: How to Make Cardboard Vehicles with Laser Cutting
- Part 4: FAQs about Making Cardboard Vehicles
Part 1: Why Use Cardboard to Make Vehicles?
Cardboard is widely used for creative vehicle projects across Europe because it is cost-effective, lightweight, and easy to source. As a recyclable material, it also supports sustainable crafting and educational activities. For vehicle models that do not require high structural strength, cardboard provides enough flexibility for rapid prototyping and design adjustments.
One of the biggest benefits of cardboard is its ease of handling. Unlike wood or metal, cardboard can be cut and assembled safely with basic craft tools, making it suitable for schools, maker spaces, and family projects. If part of the design needs changing, the material can be replaced quickly and at a low cost, helping creators test ideas more efficiently.
Cardboard is compatible with both traditional crafting methods and modern digital fabrication tools. Simple vehicle models can be built with hand tools and glue, while laser cutting systems allow makers to achieve cleaner cuts and more precise component shapes. In the EU, many hobbyists and small workshops prefer compact laser machines with Class 1 Laser Safety features for safer indoor use and improved project accuracy.
Part 2: Two Methods to Make Cardboard Vehicles
There are two primary methods for making cardboard vehicles: traditional handcrafting and laser cutting. Each approach supports different levels of complexity, production scale, and user experience.
Method 1: Handcrafting Cardboard Vehicles (Traditional Way)
Traditional cardboard vehicle construction uses basic tools such as scissors, utility knives, rulers, and glue. Makers draw the vehicle parts onto cardboard sheets before cutting and assembling them manually.
This method is commonly used for beginner projects, school activities, and creative DIY learning. It helps develop practical skills such as measuring, problem-solving, and design thinking, while allowing creators to experiment freely without specialised equipment. Across Europe, handcrafting remains popular in educational maker programmes and family craft activities because it is affordable and accessible.
Despite these benefits, manual construction has limitations. Hand-cut pieces may vary slightly in size, maintaining symmetry can be difficult, and more advanced vehicle structures with moving components are harder to produce accurately. Creating multiple identical models also requires considerable time and manual effort.
Method 2: Laser Cutting Cardboard Vehicles
Laser cutting provides a more advanced and precise production method for cardboard vehicles. Instead of manually sketching and cutting each part, users import a digital vector design into the laser cutting machine. The system automatically controls the laser path according to the design file.
This enables accurate cutting of components such as wheels, axles, structural panels, and decorative elements directly from the cardboard sheet in a single process. The resulting parts feature cleaner cuts, consistent dimensions, and improved fitting accuracy, making final assembly much faster and more reliable.
Because of its precision and repeatability, laser cutting is widely used in EU schools, fabrication labs, and small production workshops.
Comparison Table
| Aspect | Handcrafting | Laser-Cut Method |
|---|---|---|
| Precision | Skill-dependent | Very high |
| Learning Curve | Low | Medium |
| Tools Needed | Scissors, knife, glue | Laser cutter, design software |
| Design Complexity | Basic shapes | Complex structures |
| Batch Production | Limited efficiency | Highly efficient |
| Assembly Speed | Slower | Faster |
| Best For | DIY learning, children | Education, makers, small-scale manufacturing |
Which Method Is Best for Making Cardboard Vehicles?
Laser cutting is often the preferred solution for modern cardboard vehicle production, particularly when consistency and efficiency are important.
In educational environments, laser cutting ensures that every student receives identical parts, allowing teaching to focus more on engineering concepts, structure, and creativity instead of manual cutting precision. It also helps reduce setup time and material waste in workshops and fabrication spaces.
For independent creators and small businesses, laser cutting makes batch production significantly easier. Once a digital template is prepared, the same design can be reproduced repeatedly with consistent quality, reducing labour requirements and minimising human error. This allows more complex or detailed vehicle kits to be manufactured efficiently.
Laser engraving also adds additional customisation possibilities. Names, branding elements, decorative graphics, or themed patterns can be engraved directly onto the cardboard surface with high precision. Producing these features manually would be far more time-consuming and less consistent.
Traditional handcrafting still plays an important role in creative experimentation and beginner education. However, for projects that require precision, repeatability, and scalable production, laser cutting is generally the more effective manufacturing method.
Part 3: How to Make Cardboard Vehicles with Laser Cutting
Making cardboard vehicles with a laser cutter combines digital fabrication with manual assembly. Once the setup process is complete, laser cutting allows makers to create accurate and repeatable cardboard vehicle components efficiently.
Tools and Materials
Before starting, prepare the following tools and materials:
- Corrugated cardboard, kraft cardboard, or chipboard
- Design software that supports SVG or DXF files
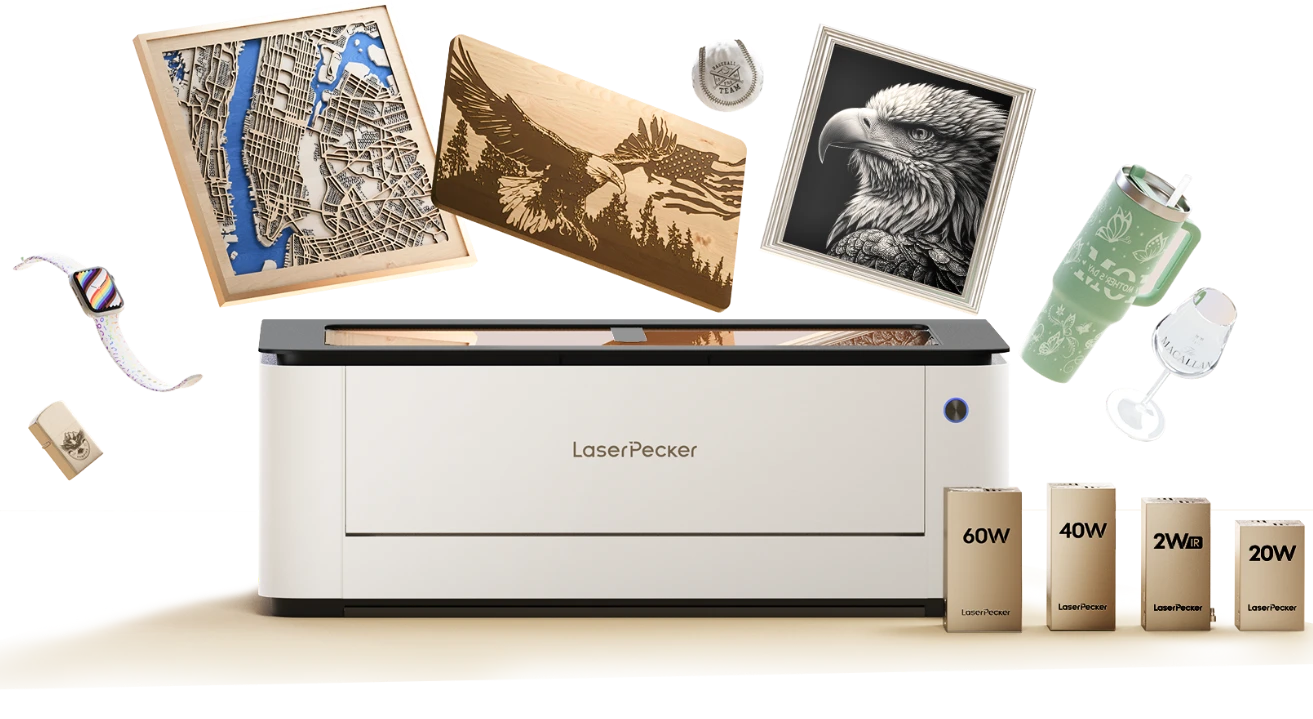
- A laser cutter such as the LaserPecker LX2
- Glue or slot-fit assembly connections
- Optional decorative materials such as paint, markers, or printed graphics
For EU hobbyists, educational makers, and small workshops, the LaserPecker LX2 is especially suitable because it combines compact operation, precision cutting, and enhanced indoor safety features.
Why the LaserPecker LX2 Is Suitable for Cardboard Vehicle Projects
High-precision cutting performance: The LX2 can accurately cut wheels, structural frames, axles, and support sections, ensuring the cardboard vehicle parts match the digital design closely and fit together more reliably.
Flexible material adjustment: When using different cardboard types or thicknesses, users only need to adjust laser power and speed settings in the software. No mechanical tool replacement is required.
Camera-assisted material positioning: The integrated camera system helps users align the design directly on the cardboard sheet, reducing waste and improving cutting efficiency.
Combined cutting and engraving workflow: In addition to cutting structural components, the laser cutter can engrave decorative graphics, logos, names, or panel details during the same production process.
Efficient batch production capability: The LX2 is well-suited for producing multiple cardboard vehicle kits with consistent dimensions and repeatable quality, making it useful for educational projects and small-scale commercial production.
Safer indoor operation: The LaserPecker LX2 features Class 1 Laser Safety, making it suitable for indoor workshops, classrooms, and maker environments across Europe. For additional air purification during laser cutting and engraving, the LX2 can also be used together with the LaserPecker Desktop Smoke Purifier, which helps filter smoke, odours, and airborne particles generated during operation.
Steps to Make Cardboard Vehicles
Step 1: Design the Vehicle
Create or download a digital vehicle template that includes the body panels, wheels, axles, and assembly connections. Slot-and-tab designs are commonly used because they improve assembly accuracy and structural stability.
Step 2: Prepare the Cardboard Sheet
Position the cardboard flat on the laser cutter bed. Keeping the material level and clean helps maintain cutting consistency throughout the project.
Step 3: Configure the Laser Settings
Adjust the laser power and cutting speed according to the thickness and density of the cardboard. Lower power settings combined with faster cutting speeds can help minimise edge scorching.
Step 4: Perform a Test Cut
Test a small section before running the full design. This allows you to verify cutting quality and ensure the assembly slots fit correctly.
Step 5: Start Cutting and Engraving
Run the design through the laser cutter. The machine will automatically cut the required vehicle components while engraving decorative or functional markings if included in the file.
Step 6: Assemble the Vehicle Model
Carefully remove the finished parts from the cardboard sheet. Fold and connect the components using slots or glue, then install wheels and movable parts during final assembly.
Part 4: FAQs about Making Cardboard Vehicles
Q1. Which Cardboard Type Is Best for Building Vehicle Models?
Corrugated cardboard is generally recommended for larger vehicle structures because it provides better rigidity and durability. For smaller or highly detailed models, chipboard or kraft board is often preferred due to its smoother surface and cleaner cutting performance. Avoid wet or coated cardboard because it may reduce cutting precision and assembly quality.
Q2. Is It Safe to Use a Laser Cutter on Cardboard?
Yes, cardboard can be laser cut safely when the correct operating procedures are followed. Users should apply suitable laser settings, ensure proper ventilation, and supervise the machine during operation. The LaserPecker LX2 includes Class 1 Laser Safety features, making it suitable for classrooms, indoor workshops, and maker spaces across Europe. For improved indoor air quality, many users also combine the LX2 with the LaserPecker Desktop Smoke Purifier to help filter smoke, odours, and fine particles generated during laser cutting.
Q3. What Is the Easiest Way to Make a Cardboard Car?
A simple rectangular body with pre-designed wheels and axle slots is usually the easiest starting point for beginners. Downloadable templates and laser-cut kits can simplify the process significantly because the components are already sized correctly and ready for assembly.
Q4. Can Cardboard Be Painted Without Becoming Warped?
Yes, but applying light paint layers is important. Heavy paint application can introduce moisture that softens the cardboard structure. Many makers first apply a primer or sealing layer to improve paint adhesion and reduce material deformation.
Q5. Why Is Laser Cutting Better Than Manual Cutting for Cardboard Vehicles?
Laser cutting provides cleaner edges, higher precision, and more consistent component sizing compared with manual cutting methods. This is especially useful when building multiple cardboard vehicles or producing more advanced models with moving parts and detailed structures.
Q6. Are Cardboard Vehicle Kits Suitable for Educational Use?
Yes. Cardboard vehicle kits are commonly used in EU educational programmes, fabrication labs, and STEM learning activities. They help students explore engineering principles, creative design, and assembly techniques while keeping material costs relatively low.
Conclusion
Making cardboard vehicles is a creative and cost-effective activity suitable for education, hobby projects, and small maker workshops. Traditional handcrafting works well for simple designs and beginner learning, while laser cutting provides greater precision, repeatability, and support for more advanced vehicle structures.
With suitable materials and the laser cutter, cardboard can be used to produce detailed vehicle models for STEM education, creative prototyping, and small-scale production. The LaserPecker LX2 is particularly suitable for indoor use because it combines precise cutting performance with Class 1 Laser Safety features. When paired with the LaserPecker Desktop Smoke Purifier, it can also help improve indoor air quality during laser cutting and engraving projects.
From simple cardboard cars to highly detailed vehicle kits, these projects offer an engaging way to explore engineering ideas, design processes, and hands-on creativity.


