


Custom buttons are widely used for fashion, accessories, crafts, promotional products, and personalised handmade items. Rather than using mass-produced designs, many creators and small businesses across Europe choose custom buttons to achieve more flexibility in size, shape, materials, and branding.
There are now several practical methods for making custom buttons, including traditional crafting techniques and modern digital manufacturing tools. Each method offers different benefits depending on your budget, production volume, material preferences, and design complexity.
In this guide, we compare five popular custom button-making methods, outline their strengths and limitations, and explain why laser engraving and laser cutting are becoming popular solutions for EU hobbyists, Independent artisan businesses , and small creative businesses.

In this article:
- Part 1: 5 Popular Methods for Making Custom Buttons
- Method 1: Hand Sewing Buttons
- Method 2: 3D Printing Custom Buttons
- Method 3: Button Moulding Techniques
- Method 4: Laser Engraving Custom Buttons
- Method 5: Laser Cutting Custom Buttons
- Part 2: Why Laser Engraving & Cutting Are Ideal for Custom Button Making
- Part 3: How to Make Custom Buttons with Laser Engraving and Cutting
- FAQs: Hot Questions about Making Custom Buttons
Part 1: 5 Popular Methods for Making Custom Buttons
There is no single "best" way to make custom buttons. The right method depends on your budget, preferred materials, production quantity, and the level of detail you need. Some techniques are better suited to handmade fabric crafts, while others are designed for precise branding, personalised products, or small-batch production.
Below are five of the most common methods used by hobbyists, makers, and small businesses in the EU.
Method 1: Make Custom Buttons with Hand Sewing
Hand sewing is a classic method for producing decorative fabric buttons using basic sewing tools and materials. Fabric is wrapped around a small base and stitched together by hand to create a finished button.
This technique is ideal for clothing repairs, decorative garments, sewing projects, and vintage-inspired fashion. Since it only requires basic sewing tools, it's an accessible option for beginners and hobbyists.
One of its biggest advantages is flexibility—you can easily match the fabric, colour, and texture of your garment. However, producing multiple identical buttons takes time, and the final durability depends on the quality of the stitching.
Hand Sewing Steps
- Cut a fabric circle slightly larger than the finished button.
- Place a button base or soft padding in the centre.
- Fold the fabric edges inward around the base.
- Sew a running stitch around the edge.
- Pull the thread tight to gather the fabric.
- Secure the thread and attach the finished button.
Method 2: Make Custom Buttons with 3D Printing
3D printing is a modern solution for producing highly customised buttons from digital designs. Using CAD software and a 3D printer, you can create unique shapes, engraved logos, raised textures, and intricate patterns that are difficult to achieve with traditional methods.
Common printing materials include PLA, ABS, and resin, with each offering different levels of strength and surface finish.
This method is best suited for:
- Prototype development
- Personalised small-batch production
- Creative or complex button designs
Although 3D printing offers outstanding design freedom, it requires access to a printer and basic modelling skills. Printed buttons may also need sanding or other post-processing for a smoother finish.
Method 3: Make Custom Buttons with Moulding
Moulding creates buttons by casting or injecting materials such as resin or plastic into a pre-made mould. It is widely used in commercial manufacturing because it delivers consistent size, shape, and surface quality.
Compared with handmade methods, moulding is much more efficient for producing large quantities of identical buttons. Once the mould is ready, each button can be made quickly with minimal variation.
However, moulds and specialised equipment involve a significant upfront investment, making this process more suitable for factories and high-volume production than for one-off custom projects.
Moulding Steps
- Prepare or purchase a suitable button mould.
- Mix or prepare the resin or plastic material.
- Pour or inject the material into the mould.
- Allow it to cure or cool completely.
- Remove the button and trim any excess material.
Method 4: Make Custom Buttons with Laser Engraving
Laser engraving is one of the best ways to personalise pre-made buttons with names, logos, intricate patterns, or decorative artwork. Instead of cutting through the material, the laser permanently marks the surface while preserving the button's original shape.
It works well on a variety of materials, including wood, acrylic, leather, and coated metal, making it suitable for both personal projects and commercial products.
Popular among EU makers, Not On The High Street sellers, and small creative businesses, laser engraving delivers high precision, fast production, and consistent, professional-looking results with minimal manual effort.
Compact laser engravers are especially suitable for home workshops because they are easy to use and require little workspace. For a cleaner and safer indoor environment, many users also pair them with a smoke purification system.

Source: LaserPecker LP4 Group
Method 5: Make Custom Buttons with Laser Cutting
Laser cutting uses a focused laser beam to cut button shapes directly from flat materials with exceptional precision. It is an efficient way to produce custom buttons with clean edges, consistent shapes, and intricate designs that are difficult to achieve with manual cutting.
Common materials include:
- Wood
- Acrylic
- Leather
- Cardboard
- Thin plastics
One of the biggest advantages of laser cutting is that it can be combined with laser engraving in a single workflow. You can cut custom button shapes, create sewing holes, and engrave names, logos, or decorative patterns without switching machines, making production faster and more efficient.
Whether you're making personalised buttons for crafts, gifts, or small-batch sales, laser cutting offers an excellent balance of affordability, flexibility, and professional-quality results.
Comparison of Popular Custom Button Making Methods
| Method | Precision | Common Materials | Setup Cost | Batch Consistency | Detail Level | Best For |
|---|---|---|---|---|---|---|
| Hand Sewing | Low | Fabric, thread, textiles | Very Low | Low | Low–Medium | Handmade crafts |
| 3D Printing | High | PLA, ABS, resin | Medium | High | Very High | Prototypes & creative designs |
| Moulding | Very High | Plastic, resin | High | Very High | Medium | Large-scale production |
| Laser Engraving | Very High | Wood, acrylic, leather, coated metal | Medium | Very High | High | Personalisation & branding |
| Laser Cutting | Very High | Wood, acrylic, leather, cardboard | Medium | Very High | Very High | Custom shapes & small batch |
Part 2: Why Laser Engraving & Cutting Are Ideal for Custom Button Making
Among all custom button-making methods, laser engraving and laser cutting stand out for their precision, flexibility, speed, and professional-quality results. Whether you're creating one-of-a-kind gifts or producing small batches for sale, laser technology offers an efficient workflow with consistently accurate results.
Unlike traditional hand tools, laser machines use digitally controlled laser beams to engrave or cut materials with exceptional accuracy. This makes it easy to reproduce identical designs while reducing manual effort and material waste.
Why Laser Engraving Works Well for Custom Buttons
Laser engraving is designed to personalise the surface of pre-made buttons without changing their shape. It can permanently engrave logos, names, text, decorative artwork, patterns, and other branding elements with crisp detail.
Because the laser only modifies the surface layer, the surrounding material remains clean and undamaged. It works particularly well on materials such as:
- Wood
- Acrylic
- Leather
- Coated metal
For hobbyists, home workshops, and small businesses, laser engraving is an excellent way to create personalised products with a professional finish. Once a design file is prepared, it can be engraved repeatedly across multiple buttons with outstanding consistency.
Why Laser Cutting Is Effective for Button Production
While laser engraving decorates the surface, laser cutting creates the button itself. Using a digital design file, the laser can accurately cut button outlines, sewing holes, decorative edges, and intricate custom shapes in a single process.
Compared with manual cutting tools, laser cutting produces cleaner edges, greater dimensional accuracy, faster production, and more consistent results. It also reduces the need for sanding or additional finishing.
Common materials for laser-cut buttons include:
- Plywood
- Acrylic sheets
- Leather
- Cardboard
- Thin wooden boards
The Benefits of Combining Laser Engraving and Laser Cutting
One of the greatest advantages of laser technology is that engraving and cutting can be completed within the same workflow. For example, you can engrave a logo or decorative pattern first, then cut the finished button shape without changing machines.
This streamlined process improves production speed, reduces manual adjustments, and ensures consistent quality across every button, making it ideal for:
- DIY makers
- Online craft shops
- Small businesses
- Personalised merchandise brands
Compact desktop laser engravers are particularly well suited to home workshops because they occupy little space while delivering professional-level precision. Many users also pair them with a smoke purification system to help filter fumes and odours during indoor engraving and cutting.
Why Many Beginners Choose Laser Technology
Compared with moulding equipment or industrial manufacturing methods, laser engraving and laser cutting have a much lower barrier to entry. They allow makers to experiment with new ideas without investing in expensive moulds or production tooling.
With a laser machine, you can:
- Create fully customised designs.
- Produce small batches cost-effectively.
- Switch between different materials with ease.
- Modify designs instantly without replacing moulds.
Thanks to their flexibility, repeatability, and creative freedom, laser engraving and laser cutting have become two of the most popular methods for making custom buttons for both hobbyists and small businesses.
Part 3: How to Make Custom Buttons with Laser Engraving and Cutting
Laser engraving and laser cutting are among the most efficient ways to create personalised buttons with professional-quality results. Compared with manual crafting methods, a laser engraver and cutter delivers greater precision, cleaner edges, and more consistent results, making it ideal for both one-off creations and small-batch production.
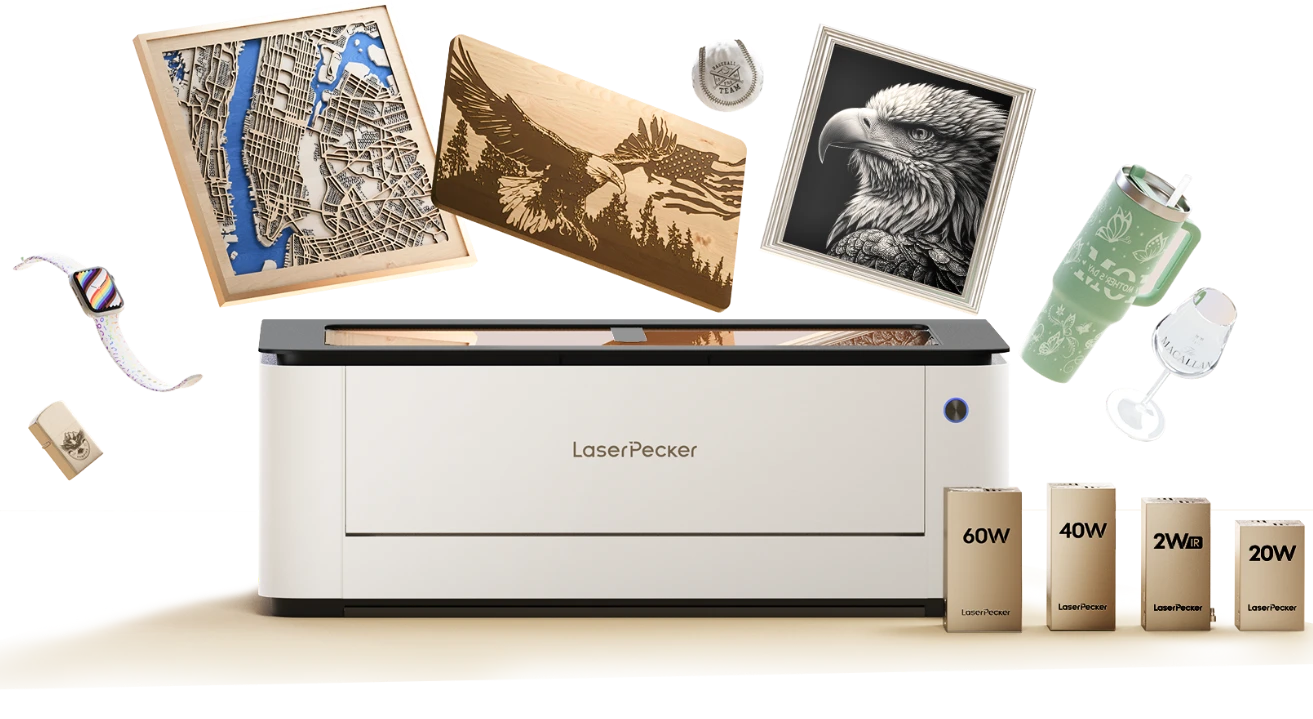
For beginners, hobbyists, and small businesses in the EU, compact desktop machines such as the LaserPecker LX2 make it easy to produce custom buttons without investing in large industrial equipment or requiring advanced manufacturing skills.
With a digitally controlled workflow, users can create custom shapes, decorative patterns, engraved logos, text, and personalised products with exceptional accuracy and repeatability.
The LaserPecker LX2 also features Class 1 Laser Safety, making it a safer choice for desktop use in home workshops and creative studios. For a cleaner indoor working environment, many users pair it with the LaserPecker Desktop Smoke Purifier, which helps filter smoke, odours, and airborne particles generated during engraving and cutting.
Step-by-Step Guide to Making Custom Buttons
- Create the Design. Design the button outline, sewing holes, and engraved artwork using vector software.
- Prepare the Material. Place the material flat on the laser bed and secure it to prevent movement.
- Adjust Laser Settings. Select the appropriate power and speed based on the material and thickness. Test on a scrap piece before engraving.
- Engrave the Design. Engrave logos, text, or decorative patterns before cutting to achieve better alignment.
- Cut the Button. Cut the button outline and sewing holes according to the design file.
- Finish the Button. Lightly sand the edges, remove any residue, and apply oil, wax, or sealant if desired to improve appearance, durability, and moisture resistance.
After finishing, your custom buttons are ready for sewing projects, fashion accessories, handmade crafts, personalised gifts, or small-batch retail products.
FAQs: Hot Questions about Making Custom Buttons
Q1: What is the best material for custom buttons?
Wood and acrylic are two of the most popular materials for custom buttons because they offer an excellent balance of durability, appearance, and engraving quality.
Wood creates a natural, textured look that is ideal for handmade crafts and rustic designs, while acrylic offers a smooth finish in a wide variety of colours for modern or branded products. Leather is another great option for fashion accessories and decorative textile projects.
The best material ultimately depends on the style, durability, and finish you want for your finished buttons.
Q2: Can laser engraving be used on metal buttons?
Yes. Laser engraving can be used on many types of metal buttons, particularly coated metals or materials compatible with infrared and fibre laser technology.
Different laser sources are suited to different applications. Diode lasers perform well on coated metals, infrared lasers improve marking performance on many metal surfaces, and fibre lasers are commonly used for direct engraving on bare metals in industrial applications.
The final engraving quality depends on the material, surface coating, and laser settings.
Q3: Are laser-engraved buttons durable?
Yes. Unlike printed graphics or labels, laser engraving permanently marks the surface of the material rather than adding a layer on top.
As a result, laser-engraved buttons are more resistant to fading, peeling, and everyday wear, making them an excellent choice for personalised gifts, branded merchandise, and handmade accessories.
Q4: How much does it cost to make custom buttons?
The overall cost depends on several factors, including the production method, material, equipment, and the number of buttons you plan to make.
Handmade Cutting & Assembly
This is usually the most affordable option for beginners because only basic tools and materials are required. However, producing large quantities by hand can be slow and labour-intensive.
Printed Buttons
Printed buttons are cost-effective for small and medium-sized batches. Most of the cost comes from printing supplies, coatings, and button components, although printed designs may wear over time.
Moulded or Injection-Moulded Buttons
Moulding requires the highest upfront investment because custom moulds must be produced. However, once the mould is made, the cost per button becomes very low for large production runs.
Laser Engraving and Laser Cutting
Laser engraving and laser cutting are among the most cost-effective options for personalised products and small-batch production because they eliminate mould costs and allow designs to be changed instantly.
Although purchasing a laser machine requires an initial investment, many EU hobbyists and small businesses find it worthwhile thanks to its precision, design flexibility, consistent results, and efficient repeat production.
Q5: Is a desktop laser cutter safe for home workshops?
Many modern desktop laser machines are designed with built-in safety features for indoor use.
For example, the LaserPecker LX2 features Class 1 Laser Safety, helping provide a safer engraving and cutting experience in home workshops and creative studios.
Many users also pair their laser machine with the LaserPecker Desktop Smoke Purifier, which helps filter smoke, odours, and airborne particles generated during operation for a cleaner indoor workspace.
Q6: Is laser engraving suitable for small craft businesses?
Absolutely. Laser engraving and laser cutting are widely used by Not On The High Street sellers, Etsy shop owners, market stall vendors, and personalised product businesses because they make custom production both efficient and scalable.
With a laser machine, makers can quickly personalise products, produce economical small batches, maintain consistent quality across repeat orders, and create professional branding without investing in expensive manufacturing equipment.
Conclusion
There are many ways to make custom buttons, and the best method depends on your materials, budget, and production goals. Traditional techniques remain ideal for simple crafts, while 3D printing offers greater design freedom for prototypes and unique creations.
For makers, hobbyists, and small businesses looking for precision, efficiency, and professional-quality results, laser engraving and laser cutting provide one of the most versatile solutions. Whether you're creating personalised buttons for DIY projects, gifts, or small-batch sales, laser technology makes it easy to produce consistent, high-quality buttons with minimal manual effort.


