


Fabric cutting plays a key role in sewing, fashion making, and creative DIY projects across Europe. Choosing the proper cutting method can improve precision, reduce fabric waste, and create smoother, cleaner edges. Since different materials react differently to cutting tools, selecting the right technique is essential for achieving high-quality results.
In this guide, we'll introduce five popular fabric cutting methods, including manual tools and modern laser cutters. Whether you work with cotton, polyester, denim, or technical fabrics, these practical tips will help you cut fabric more accurately for home crafting, small businesses, or workshop production.

In this article:
- Part 1: Why Knowing the Methods of Cutting Fabric Matters
- Part 2: Five Ways to Cut Fabric You Need to Know
- Method 1: Using Fabric Scissors
- Method 2: Using Rotary Cutter
- Method 3: Using Craft Knife / X-Acto Knife
- Method 4: Using Electric Fabric Cutter
- Method 5: Using Laser Cutter
- Part 3: How to Cut Fabric with Laser Cutting
- Part 4: FAQs about Cutting Fabric
Part 1: Why Knowing the Methods of Cutting Fabric Matters?
Fabric cutting is one of the most important steps in sewing, fashion production, and DIY crafting. The cutting method you choose can affect precision, material stability, durability, and the overall finish of the final product. Different fabrics respond differently to cutting tools, so understanding proper cutting techniques helps improve quality while reducing unnecessary fabric waste.
Reason 1: Avoid Cutting Mistakes That Waste Time and Money
Once fabric has been cut incorrectly, it is often impossible to fully correct the mistake. Uneven edges, inaccurate measurements, or accidental stretching can affect the entire project and may require recutting new fabric pieces.
This is particularly important when using expensive textiles, printed fabrics, or limited production materials. Even small cutting inaccuracies can create alignment problems during sewing and assembly.
To improve cutting accuracy, consider these key practices:
- Choose cutting tools suitable for the fabric material
- Secure fabric properly before marking and cutting
- Follow pattern outlines carefully
- Use sharp blades or scissors to prevent frayed edges
Learning proper fabric cutting methods can help reduce material waste, improve workflow efficiency, and achieve more consistent results.
Reason 2: Achieve Better Fit and Shape
Precise fabric cutting allows pattern pieces to maintain accurate sizing and proportions. This helps seams align correctly and improves the overall fit and appearance of garments or craft products.
Inaccurate cutting may lead to uneven edges, distorted shapes, or poorly matched seams, even when sewing techniques are correct. Clean cutting also helps maintain fabric integrity, especially when working with synthetic fabrics, layered textiles, or stretch materials commonly used in European fashion and DIY applications.
For EU hobbyists, designers, and small businesses, accurate fabric cutting can improve both production consistency and finishing quality.
Part 2: Five Ways to Cut Fabric You Need to Know
There is no universal fabric cutting method suitable for every textile project. Different cutting tools provide different levels of speed, precision, and material control depending on the fabric type, production scale, and design requirements.
Whether you are involved in fashion production, textile crafting, upholstery work, or DIY sewing projects, understanding the strengths of each cutting method can help improve efficiency and final product quality.
Method 1: Using Fabric Scissors
Fabric scissors are one of the most widely used tools for cutting fabric in sewing, tailoring, and textile crafts. Their long, sharp blades provide excellent control, making them suitable for both straight cuts and gentle curves across a wide range of materials.
They are commonly used for cotton and other woven fabrics, garment sewing, home textiles, and everyday craft projects. Because they rely on manual control, however, maintaining consistent accuracy can become more challenging when cutting thick fabrics, multiple layers, or long continuous lines.
For EU sewing enthusiasts and independent makers, using dedicated fabric scissors instead of general-purpose household scissors helps produce cleaner edges, improves cutting precision, and extends the life of the blades.
Method 2: Using a Rotary Cutter
Rotary cutters are a popular choice for quilting, pattern making, and fabric production because they deliver fast, smooth cuts while reducing hand fatigue. When paired with a self-healing cutting mat, they are especially effective for cutting multiple fabric layers with consistent accuracy.
Compared with standard fabric scissors, rotary cutters offer several advantages:
- Cleaner, straighter cuts over long distances.
- Greater efficiency for repeated cutting tasks.
- Better control when cutting multiple fabric layers.
- Less hand strain during extended use.
To maintain cutting quality, replace or sharpen the rotary blade regularly, as a dull blade can drag the fabric and produce uneven edges. Thanks to their speed and precision, rotary cutters are widely used by EU textile hobbyists, quilting enthusiasts, and small fashion studios.
Method 3: Using a Craft Knife (X-Acto Knife)
Craft knives, including X-Acto knives, are designed for precision cutting where fine detail is more important than speed. They are widely used for stencil making, appliqué work, template cutting, and decorative textile projects that require intricate shapes or delicate trimming.
Because each cut is made manually, craft knives are best suited to small, detailed designs rather than large garment pieces. Using a sharp blade and a stable cutting surface helps achieve cleaner edges while reducing the risk of damaging delicate fabrics or synthetic fibres.
Method 4: Using an Electric Fabric Cutter
Electric fabric cutters are built for speed and efficiency, making them an excellent choice for cutting multiple layers of fabric or handling repetitive production tasks. They are commonly used in textile workshops, small manufacturing businesses, and custom production studios across Europe.
Compared with manual cutting tools, electric fabric cutters offer several advantages:
- Faster cutting with less physical effort.
- More consistent results when producing repeated shapes.
- Greater efficiency when cutting multiple fabric layers.
- Well suited to workshop and small-scale production environments.
While electric cutters significantly improve productivity, they are generally less suitable for intricate patterns or highly detailed work. Regular blade maintenance is also essential to maintain clean cuts and ensure consistent performance over time.
Method 5: Using Laser Cutter
A laser cutter uses a focused laser beam to cut felt materials without physical contact. This helps minimise fabric movement and maintain cutting accuracy, especially for detailed or repetitive designs.
Laser cutting is highly suitable for:
- Intricate felt patterns
- Decorative logos and lettering
- Repeated production cutting
- Personalised felt products
- Precision craft applications
Compared with manual cutting tools, laser cutting produces more consistent results while reducing fibre distortion and uneven edges.
Because of its flexibility and precision, laser cutting has become increasingly popular among EU hobbyists, designers, and small craft businesses working with felt materials.
Comparison Table
| Method | Precision | Speed | Detail Capability | Felt Distortion |
|---|---|---|---|---|
| Fabric Scissors | Medium | Slow | Low | Medium |
| Rotary Cutter | High | Medium | Medium | Low |
| Craft Knife | Very High | Slow | High | Low |
| Electric Cutter | Medium | High | Medium | Medium |
| Laser Cutting | Very High | High | Very High | None |
Laser cutting clearly stands out as one of the most effective solutions for felt cutting because it combines high precision, speed, and repeatability.
Why Laser Cutting Works Well for Felt Cutting
Cleaner Felt Edges
Laser heat helps reduce loose fibres and improves edge cleanliness during cutting.
High Precision for Detailed Designs
Intricate shapes, logos, and decorative cut-outs can be produced more accurately than with manual cutting tools.
Consistent Production Results
Laser cutters create identical cuts across multiple pieces, helping improve efficiency for small-batch production and custom orders.
Reduced Material Distortion
Because there is no physical pressure during cutting, felt maintains its original structure more effectively.
Best Scenarios for Using Laser Cutting on Fabric
Laser cutting is particularly suitable for:
- Decorative felt products
- Personalised craft items
- Felt lettering and logos
- Small-batch handmade production
- Precision decorative projects
- Workshop-based craft businesses
For indoor workshop environments, many EU users also prioritise laser safety and smoke filtration systems when working with felt cutting and engraving projects.
Part 3: How to Cut Fabric with Laser Cutting?
Laser cutting provides excellent precision and repeatability for felt cutting projects. Compared with traditional cutting tools, a laser cutter can produce cleaner edges, finer details, and more consistent results, especially when working with decorative felt designs or repeated production patterns.
Because laser cutting is a non-contact process, the felt material remains more stable during cutting, helping reduce distortion and uneven edges.
Tools and Materials to Prepare
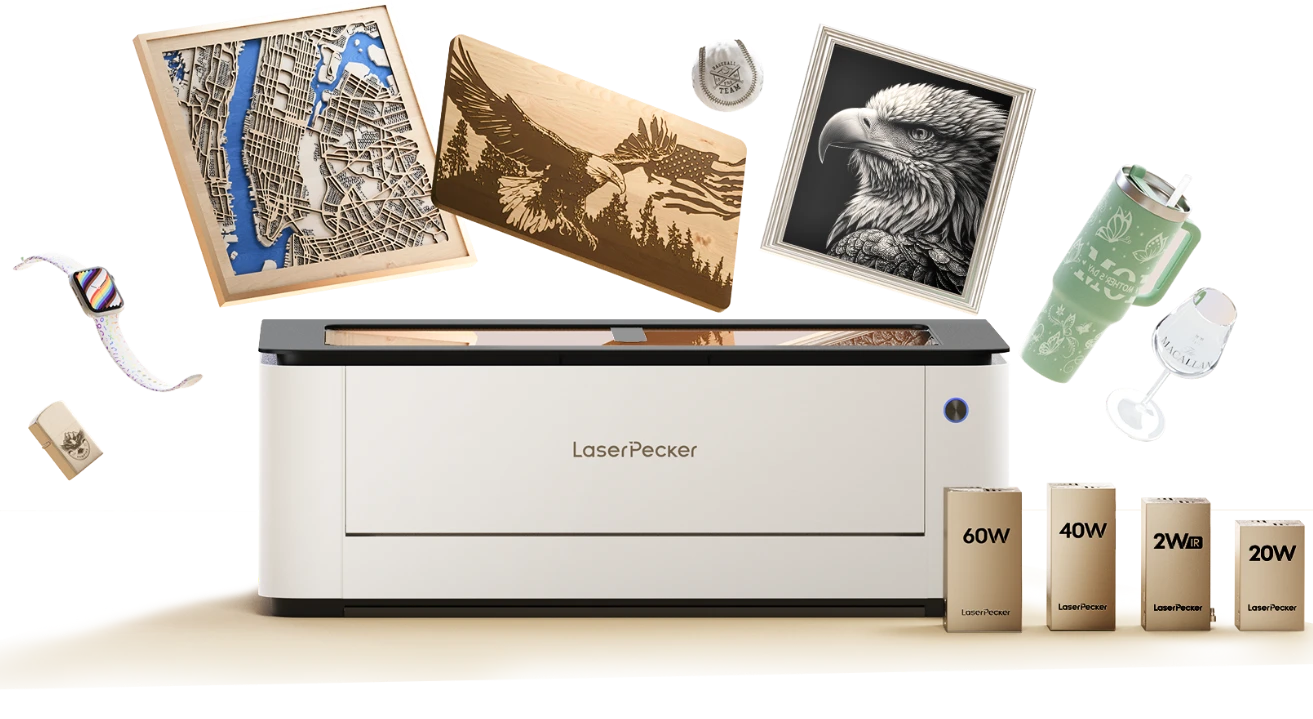
For detailed felt cutting and engraving work, the LaserPecker LX2 is a practical option because it combines accurate laser cutting with precision engraving capabilities.
In addition to cutting felt, the LaserPecker LX2 can engrave:
- Decorative artwork
- Personalised text
- Brand logos
- Positioning guides
- Creative craft patterns
This allows users to complete both engraving and cutting within a single workflow, improving efficiency for DIY crafting and small-scale production projects.
For EU users, the LaserPecker LX2 also features Class 1 Laser Safety, making it suitable for indoor creative workspaces and home workshop environments. When combined with the LaserPecker Desktop Smoke Purifier, the system can help filter smoke, fumes, and odours generated during felt cutting and engraving processes, helping improve indoor air quality and workshop safety.
Steps for Cutting Fabric with Laser Cutting
Step 1. Get Your Fabric Ready
First, lay your fabric flat on the laser platform and get rid of any wrinkles. Use weights or tape to hold it in place. Keeping it still helps make clean cuts.
Step 2. Set Up Your Design
Upload your design files to the laser software. Change the size, position, and direction as needed. If you want to both engrave and cut, keep the settings separate.
Step 3. Change Laser Settings
Change the power, speed, and focus based on the fabric type and thickness. With LaserPecker LX2, you can adjust these to avoid burning and still get clean cuts. Testing is recommended.
Step 4: Do a Test Cut
Cut a practice piece on a fabric scrap. Check the edge quality and engraving. If it's not right, change your settings.
Step 5: Do the Final Cut
When you're happy with the test, start the full job. Watch it work and carefully take away the fabric when it's done. Then, check the edges and any engraved parts.
Part 4: FAQs About Cutting Fabric
Q1. What Fabrics Cannot Be Cut with a Laser Cutter?
Not every fabric is suitable for laser cutting. Materials containing PVC, vinyl, or unknown chemical coatings should generally be avoided because they can melt, burn excessively, or release harmful fumes during processing.
Safer options include laser-compatible materials such as felt, cotton, denim, leather, and synthetic blends specifically designed for laser cutting. Regardless of the material, testing a small sample before starting a full project is always recommended to confirm the best settings and cutting quality.
Q2. How Can You Prevent Felt or Fabric from Fraying?
One advantage of laser cutting is that the heat can seal the edges of many fabrics as they are cut, helping minimise fraying without additional treatment.
If you're cutting fabric by hand, these methods can help create cleaner edges:
- Use pinking shears instead of standard scissors.
- Finish the edges with zigzag stitching.
- Apply a fabric edge sealant.
- Use stabilising or fusible backing materials where appropriate.
Good preparation and proper cutting techniques are often the most effective ways to prevent fraying before it becomes a problem.
Q3. Do Laser-Cut Felt Edges Need Additional Finishing?
In many decorative felt projects, laser-cut edges are clean enough to use immediately without additional finishing. This makes laser cutting ideal for personalised crafts, layered felt artwork, ornaments, and other precision designs.
For wearable items or textiles that will receive frequent handling, adding stitching or edge reinforcement can improve durability and extend the product's lifespan.
Q4. Is Laser Cutting More Accurate Than Hand Cutting?
Yes. Laser cutting generally delivers much higher precision and repeatability than manual cutting methods. It can produce intricate patterns, logos, lettering, and repeated shapes with consistent accuracy, making it particularly suitable for detailed designs and small-batch production.
Hand cutting remains a practical option for simple craft projects, quick alterations, or one-off cuts, but laser cutting is usually the better choice when consistency and fine detail are important.
Q5. Why Should Fabric Be Flattened Before Laser Cutting?
Keeping fabric flat helps maintain accurate laser focus, resulting in cleaner cuts and more consistent engraving. Wrinkles, folds, or trapped moisture can interfere with the laser and reduce overall cutting quality.
Before placing the material on the laser bed, make sure to:
- Remove wrinkles by ironing the fabric if necessary.
- Ensure the material is clean and completely dry.
- Lay the fabric flat and secure it to prevent movement during cutting.
Proper preparation helps improve cutting precision, engraving quality, and overall project consistency.
Q6. Is Felt Laser Cutting Safe in Indoor Workshops?
Laser cutting felt indoors can be safe when appropriate safety measures and ventilation systems are used. The LaserPecker LX2 features Class 1 Laser Safety, making it well suited for home studios, makerspaces, and indoor workshop environments.
For improved air quality, many users also pair the machine with the LaserPecker Desktop Smoke Purifier, which helps filter smoke, fumes, and odours generated during laser cutting and engraving, creating a cleaner and more comfortable workspace.
Conclusion
Fabric cutting is not simply a preparation stage — it directly affects precision, edge quality, material consistency, and the overall finish of the final product. Although traditional cutting tools remain useful for basic projects, laser cutting provides greater accuracy, cleaner edges, and improved flexibility for detailed felt cutting applications.
For creative felt projects, the LaserPecker LX2 offers both precision cutting and engraving functions, helping users produce intricate patterns, decorative details, logos, and personalised designs more efficiently.
By selecting the right cutting method and properly preparing felt materials, users can improve cutting consistency, reduce material waste, and achieve cleaner, more professional results across a wide range of felt crafting and small-scale production projects.


