


Cardboard is a strong, paper-based material widely used in packaging, DIY projects, and various creative applications.
This guide provides a complete introduction to cardboard laser cutting, covering key concepts and practical steps from start to finish. It also includes a hands-on example—how to create a laser-cut cardboard mushroom sculpture. Let's begin.

In this article:
Part 1: Overview of Cardboard Laser Cutting
1.1 What is Cardboard Laser Cutting?
Cardboard laser cutting is a precise technique used to cut and shape cardboard into customised designs, text, or detailed patterns.
With laser technology, it becomes easy to transform creative ideas into clean, high-quality results. This approach is widely used by DIY makers, designers, and small businesses across Europe.
1.2 How Does Laser Cutting Work on Cardboard?
“Can you laser cut cardboard with a laser cutter?” Yes, you can.
The process uses a focused laser beam directed at the cardboard surface. The heat generated by the laser cuts or vaporises the material along a digitally controlled path, producing accurate and consistent results.

Thanks to computer control, laser cutting enables:
- Precision cutting of complex designs
- High repeatability for batch projects
- Smooth edges with minimal post-processing
Compared to traditional cutting methods, laser cutting is more efficient and delivers cleaner finishes, making it ideal for detailed and decorative applications.
1.3 What Is a Laser Cutting Machine for Cardboard?
To achieve clean and efficient results when cutting cardboard, a dedicated laser cutting machine for cardboard is typically the best solution. These machines automate the cutting process and provide consistent accuracy, making them suitable for signage mock-ups, packaging prototypes, decorative panels, and creative workshop production across the EU.
Several laser technologies are available today, including diode, CO₂, and fibre laser systems. A common question is which type performs best when cutting cardboard materials.
For hobbyists, schools, and small workshops across the EU, compact diode-based laser cutting machines are often preferred because they combine precision, flexibility, and indoor usability within a smaller installation footprint.
Desktop diode laser engravers such as LP5, LP4, LP2 Plus and LX2 are well suited for cardboard cutting tasks and lightweight material fabrication workflows.
These cardboard laser cutting machines are:
- Beginner-friendly and easy to operate
- Compact enough for studio and maker-space environments
- More accessible in cost compared with industrial CO₂ systems
- Suitable for both cutting and engraving cardboard and other lightweight sheet materials
Among these machines, the LX2 is particularly attractive for users who require higher productivity and flexible setup options within indoor workshop environments. It supports engraving speeds of up to 1000 mm/s with acceleration up to 10,000 mm/s², enabling efficient batch processing for cardboard prototypes and packaging layouts.
Its tool-free quick-swap laser module system allows switching between 20W, 40W, and 60W diode modules depending on material thickness, making it easier to adapt cutting performance to different cardboard thickness levels.
The integrated camera-assisted positioning system improves layout accuracy before cutting begins, which is especially useful for printed cardboard templates and signage components
Importantly, the LX2 is Class 1 laser safety certified, making it particularly suitable for indoor studio environments, educational workshops, and shared maker-space installations across the EU where safety compliance is often required.
For EU users working in compact creative studios or indoor fabrication environments, diode-based desktop laser cutting machines provide one of the most practical and flexible cardboard cutting solutions available today.

💡 Case Study: Build a Laser-Cut Cardboard Mushroom Sculpture in 5 Steps
Preparation checklist
To get started, prepare the following items:
- Material: 1 - 3 mm Cardboard Sheet
- Machine: Diode Laser Cutter
- Design: Custom shapes, text, or patterns
Laser cutting cardboard is an efficient and accessible process. For small projects, cutting can often be completed within a few minutes when using the right setup.
Step 1: Choose Your Material - 1-3 mm Cardboard Sheet
Material selection plays a key role in achieving consistent results. Different cardboard types may react differently to laser settings.
Key factors to consider include:
- Thickness (1–3 mm recommended)
- Material density and surface quality
- Laser-safe composition for safe operation
This guide uses a mushroom sculpture example to demonstrate the full workflow.
Step 2: Choose the Right Laser Cutting Machine
Selecting an appropriate laser cutter ensures better efficiency and precision.
For most cardboard applications:
- offers a balanced combination of accuracy and usability
- LP5 provides higher speed and performance for more demanding tasks
- LaserPecker LX2 is suitable for larger-scale projects thanks to its higher power options
In the EU, many users prioritise machines that support safe indoor use, often pairing them with enclosures or filtration systems to meet safety expectations.
Step 3: Prepare Your Cutting Design
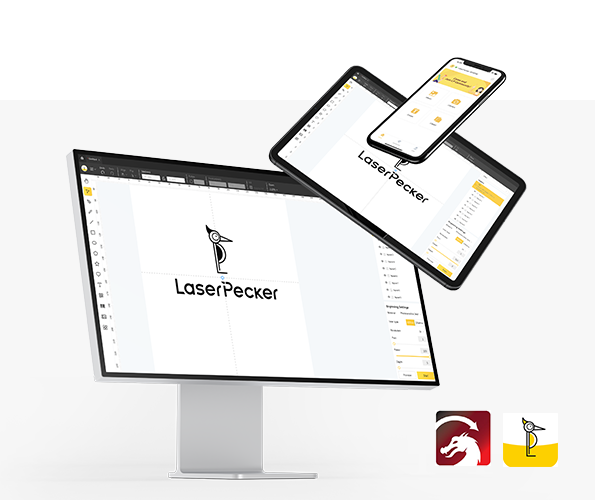
Designs can be created or imported using a graphic design app/software, including LaserPecker tools or external platforms.
When preparing your file, ensure:
- Proper sizing and proportions
- Clean vector paths for accurate cutting
- Compatibility with supported file formats
You may also browse LaserPecker CraftZone or purchase laser cut cardboard files online to access ready-made templates and creative ideas.
Step 4: Set Up the Laser Cutting Machine
Proper setup is essential for achieving consistent results:
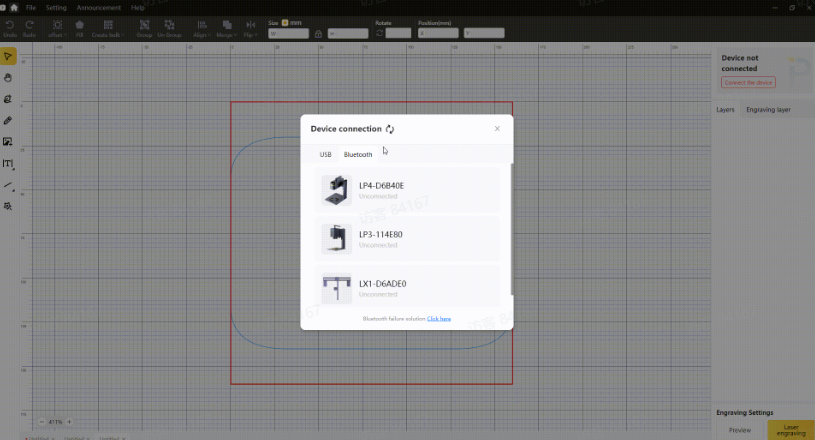
1. Connect your machine: Use Wi-Fi, USB, or Bluetooth to link your device.
2. Import your design: Upload files into LaserPecker Design Space (JPG, PNG, SVG, G-code supported).
3. Position your material: Align the cardboard and enable preview mode for accuracy.
4. Adjust placement: Ensure the design fits correctly within the material boundaries.
5. Configure laser settings: Adjust power, resolution, and depth according to your material.
Suggested starting settings (LP4 reference):
- 10W 450nm diode laser
- Resolution: 1K
- Power: 60%
- Depth: 97%
- Pass: 1
These settings provide a balanced starting point, but adjustments may be required depending on your specific material.
Step 5: Start Cutting
Once everything is set, begin the cutting process and monitor it throughout.
For safe operation:
- USE goggles or a protective enclosurer
- Avoid direct contact with the laser
- Maintain proper airflow in your workspace
Since laser cutting may generate smoke or fumes, using an air purifier is strongly recommended—particularly for indoor environments across the EU, where safety and air quality standards are often emphasised.
FAQs: Hot Questions about Cardboard Laser Cutting
1. Can cardboard be laser cut safely indoors?
Yes, but proper safety measures are essential. Use protective goggles, ensure good airflow, and operate with an air purifier or filtration system to maintain safe indoor conditions.
2. What is the recommended cardboard thickness for laser cutting?
A thickness of 1–3 mm is recommended for most laser cutting applications. This range provides a good balance between cutting speed and structural strength.
3. Which laser cutter should I choose for cardboard projects?
For hobbyists and small businesses, diode laser cutters are a practical choice. They offer reliable performance, compact design, and are suitable for a wide range of materials, including cardboard.
4. Does laser cutting cardboard produce fumes?
Yes, laser cutting can generate smoke and gases depending on the material. It is important to work in a well-ventilated area and use an air purifier where possible.
5. How can I achieve clean edges when cutting cardboard?
To improve edge quality:
- Use the correct power and speed settings
- Ensure proper focus of the lase
- Use flat, consistent material
These adjustments help reduce burn marks and improve precision.
6. Can I use ready-made design files for cardboard laser cutting?
Yes, many users choose to purchase laser cut cardboard files online or download templates. This can save time and ensure accurate, ready-to-use designs for your projects.
Conclusion
In conclusion, cardboard laser cutting combines precision and flexibility, enabling users to turn standard cardboard into detailed designs and practical products with smooth edges and high accuracy.
From DIY projects to small-scale production, it provides a reliable solution for a variety of applications. By using appropriate equipment and following essential safety practices—such as wearinggoggles and and operating with an air purifier—users can ensure both effective results and a safe workspace.


